
Apex REST allows one to create REST API endpoints within their Salesforce orgs that can then be consumed by outside applications. To create a new API endpoint, first create an Apex class. You can do so by utilizing the Developer Console.
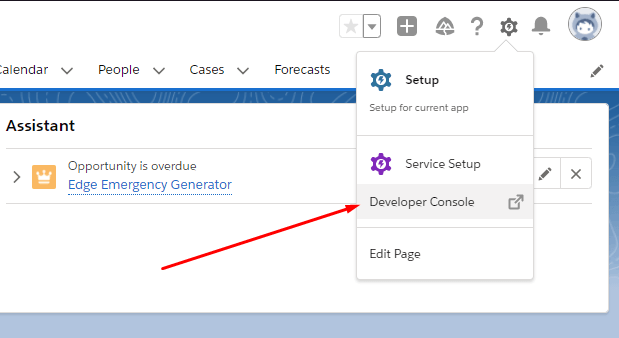
Open the Developer Console by clicking on the gear icon and then selecting “Developer Console”
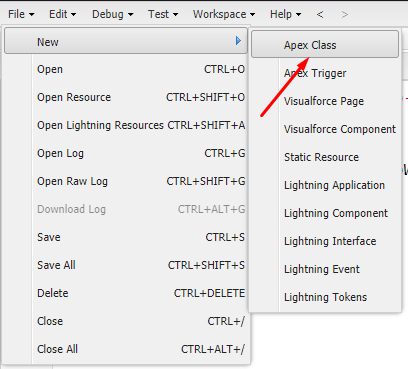
Create a new Apex Class by selecting File > New > Apex Class
Create a new Class definition like the one shown below:

A few things to note here:
— I’ve decorated the class with a @RestResource annotation to signify that this is an API endpoint. The urlMapping parameter allows you to specify the URL for this resource.
— The Apex class and methods should be marked as global to be utilized as an API endpoint.
— The method definition must be marked as static.
— You must annotate each method that you like to expose as an endpoint with the appropriate HTTP verb that should be utilized by the caller. In my example above, I’m exposing this endpoint as an HTTP GET.
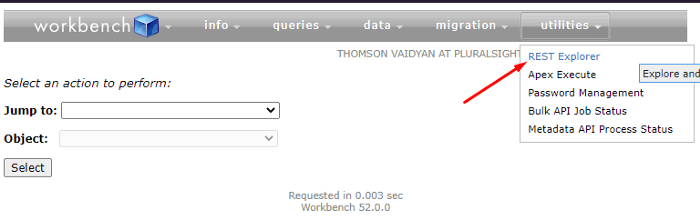
To test this endpoint that you’ve created, open up workbench by navigating to https://workbench.developerforce.com/.
Navigate to the “REST Explorer”:
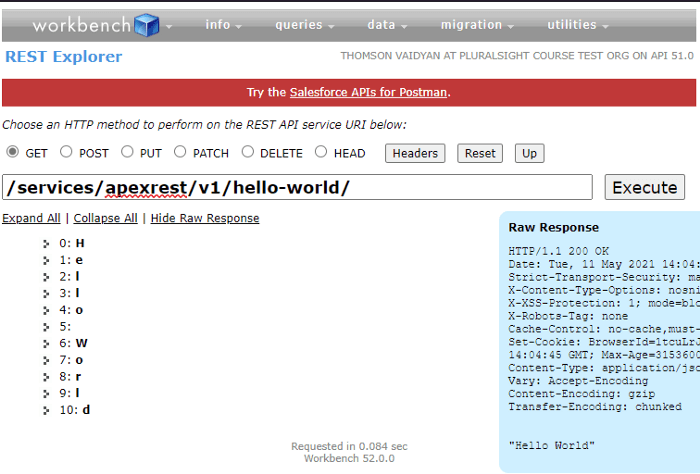
Enter the URL of your endpoint and click the “Execute” button:
Note:
— I used the “GET” method as my Hello World method is decorated as such.
— Note the URL: “/services/apexrest” is predetermined by the Salesforce platform and must be specified as such.
— “/v1/hello-world/” matches the urlMapping that I’ve defined within my Apex class. Note the trailing forward-slash at the very end. Without this, you’ll get a 404 — Not Found error. Also, in my experiments, the end-point seems to be case-sensitive.
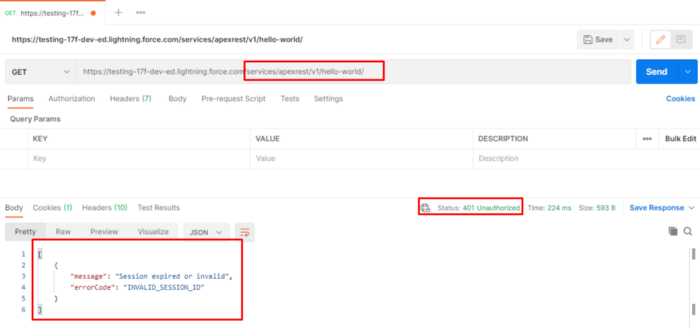
Congratulations! You’ve created your very own REST API endpoint in your Salesforce org. But how do you utilize it outside of the built-in REST Explorer within workbench? For instance, if you tried to invoke this endpoint from a browser or an API explorer tool such as Postman, you’ll get a “401 Unauthorized” error, similar to the one below:
In the next set of posts, we’ll explore creating a .NET Core application that will serve as our external client app that will communicate to our Salesforce org, pulling and pushing data using the Apex REST APIs that we build. This app must authenticate with Salesforce in order to exercise these APIs. There are a handful of different authentication scenarios that Salesforce supports. You can read all about them here:
OAuth Authorization Flows (salesforce.com)
The one that we’re interested in is called “OAuth 2.0 JWT Bearer Flow for Server-to-Server Integration”
Sometimes you want to authorize servers to access data without interactively logging in each time the servers exchange information. For these cases, you can use the OAuth 2.0 JSON Web Token (JWT) bearer flow. This flow uses a certificate to sign the JWT request and doesn’t require explicit user interaction. However, this flow does require prior approval of the client app.
In order to use the Server-to-Server Integration flow, we must have a TLS Certificate that we’ll use from within our client app to digitally sign our JWT Token request. We’ll upload this same certificate to our Connected App within Salesforce so that its authentication mechanism can authenticate the incoming token request using this same cert.
In the next post, we’ll use OpenSSL to generate a new TLS certificate and setup a new “Connected App” within our Salesforce org which will serve as our gateway to our Apex REST APIs. See you in the next one.
Part 2: Generate a New Certificate with OpenSSL for Use with Salesforce Connected App
Pingback:Create a Connected App in Salesforce as Your Apex REST API Gateway – Tom Vaidyan
Pingback:Connect to a Salesforce APEX REST API from a C# Console Application – Tom Vaidyan