
GitHub is a household name when it comes to source control management. In recent years, especially since it was acquired by Microsoft, the service provides a well-rounded software management solution that goes far beyond just source-control management. It also provides capabilities for teams to conduct team discussions, create and track issues, conduct a code-review process through pull requests, merge code from different collaborators, run security analysis on your code to uncover any known vulnerabilities, build code and deploy it to your hosting provider of choice.
However, Microsoft continues to maintain another formidable product in the same space – Azure DevOps. Ther also, you’ll find software management including issue tracking, code repositories and pipelines to enable Continuous Integration and Continuous Deployment (CI/CD). You may even find yourself in a situation (as I have) where your code is stored in GitHub while your CI/CD pipeline must go through Azure DevOps. Thankfully, both these products can be integrated together. Follow along below to learn how to automate your code review and merge process in GitHub and deploy them to your various environments through Azure DevOps.
Our Setup
Our setup includes four branches and environments of note:
- Develop: This is our default branch. This is a gated branch that disallows direct commits. All code-merging to this branch is done through a Pull Request (PR) process. When a PR is raised, we want to automatically trigger a build of this branch to confirm that we have a successful build. We don’t want to move any further with the merge if the build is failing. Once the PR is approved and code is merged into this branch, we want to automatically trigger a build and automatically trigger a release to release it to our development environment.
- Staging: Once the application is approved in the development environment, we want to merge the develop branch into staging. Once that happens, we want to automatically trigger a build and then follow that up with an automatic release to the staging environment.
- Demo: In this stage, we’ll merge our staging branch into our demo branch, automatically build and release it to the demo environment.
- Production: If our code makes it this far, we’ll then merge it to a production branch and then automatically build and release it to production. We also want to add an approval process in Azure DevOps to ensure that a designated party must sign-off on the release prior to the code being deployed.
Now, let’s get to work.
Protecting the “develop” Branch
First, to set the develop branch as your default branch, navigate to the settings menu and then the branches pane.
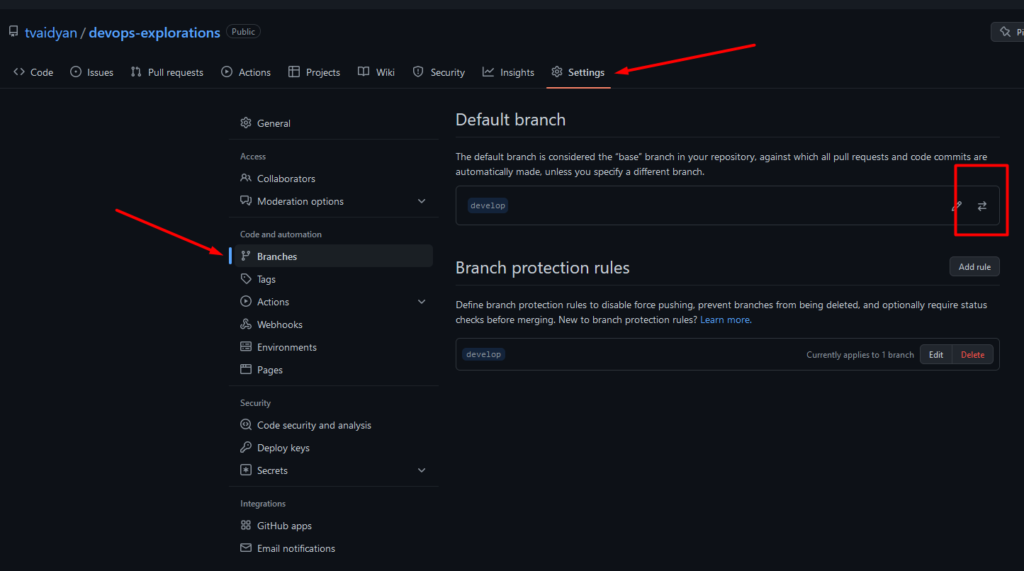
From this same screen, you can also setup branch protection rules. Click the add rule button to setup your rules.

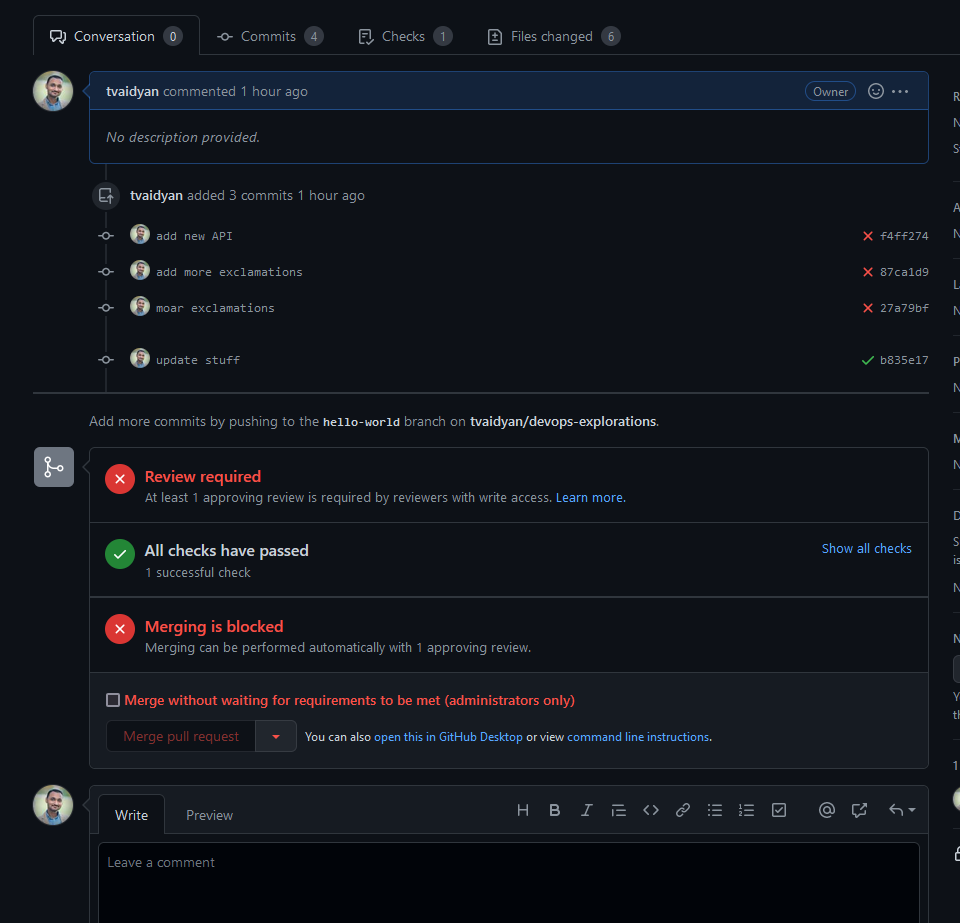
Most notably, I have selected the “require a pull request before merging” option to disallow direct commits to this branch. Developers must submit a PR to have an authorized person on the team, or a designated set of people or just someone else on the team, on a round-robin basis, review and merge new code changes into this branch.
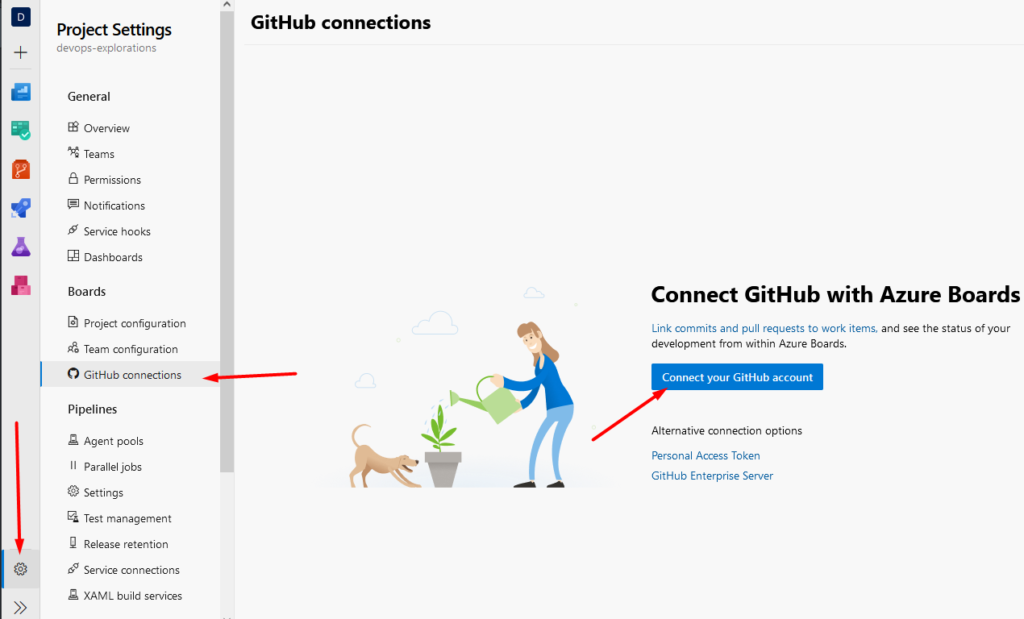
Connect Your GitHub Account to Azure DevOps
Navigate to the settings screen for your Azure DevOps. Click on GitHub Connections and follow the prompts to connect your GitHub account. Once you authorize Azure DevOps to connect to your GitHub account, it will pull down a list of your repositories. Select one ore more repositories that you’d like to connect to Azure DevOps.
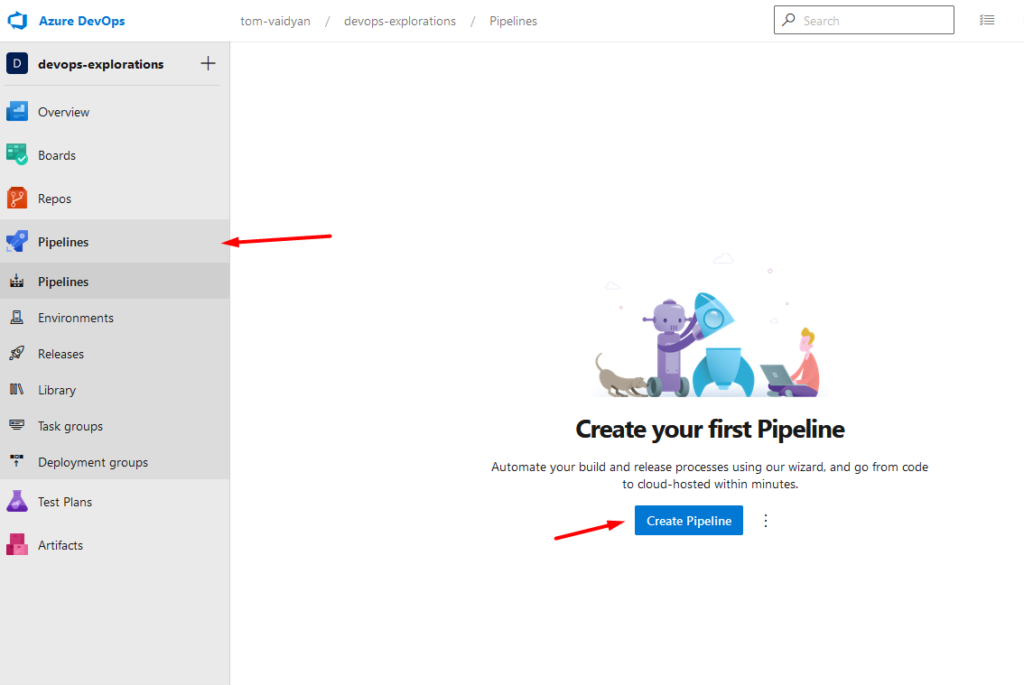
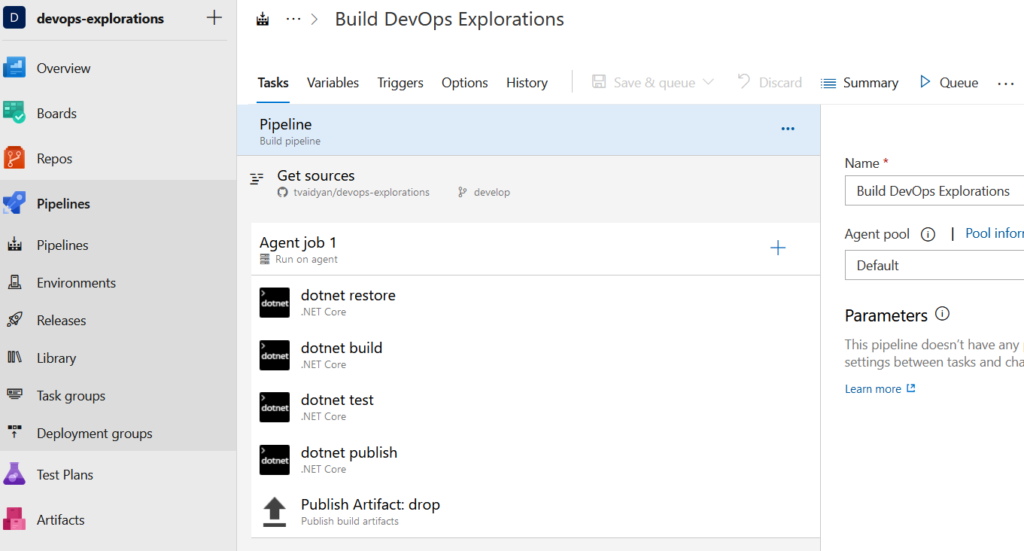
Create a Build Pipeline
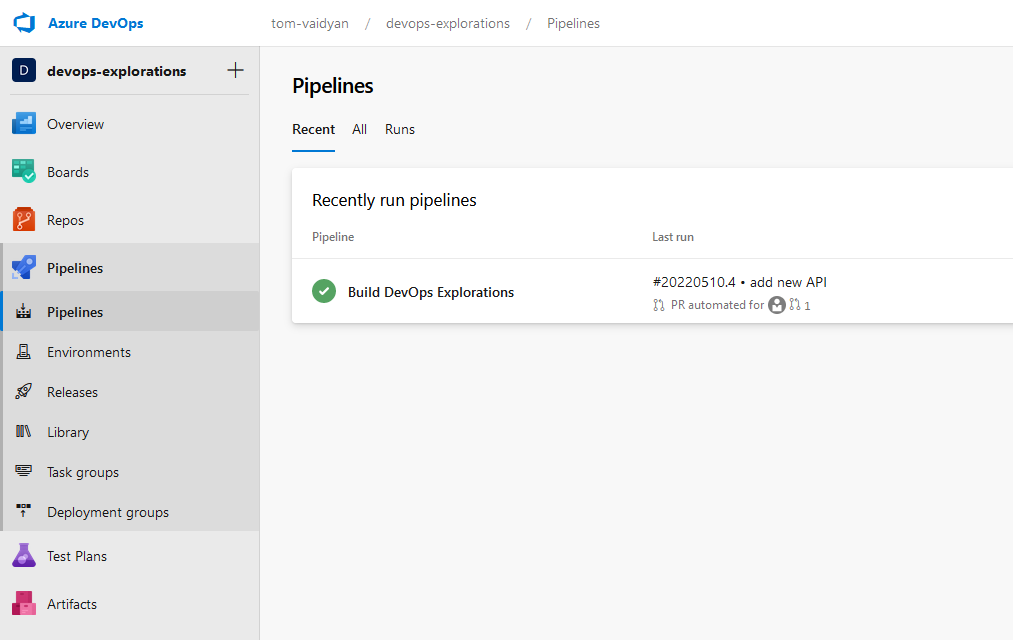
Navigate to the Pipelines section and create a new pipeline.
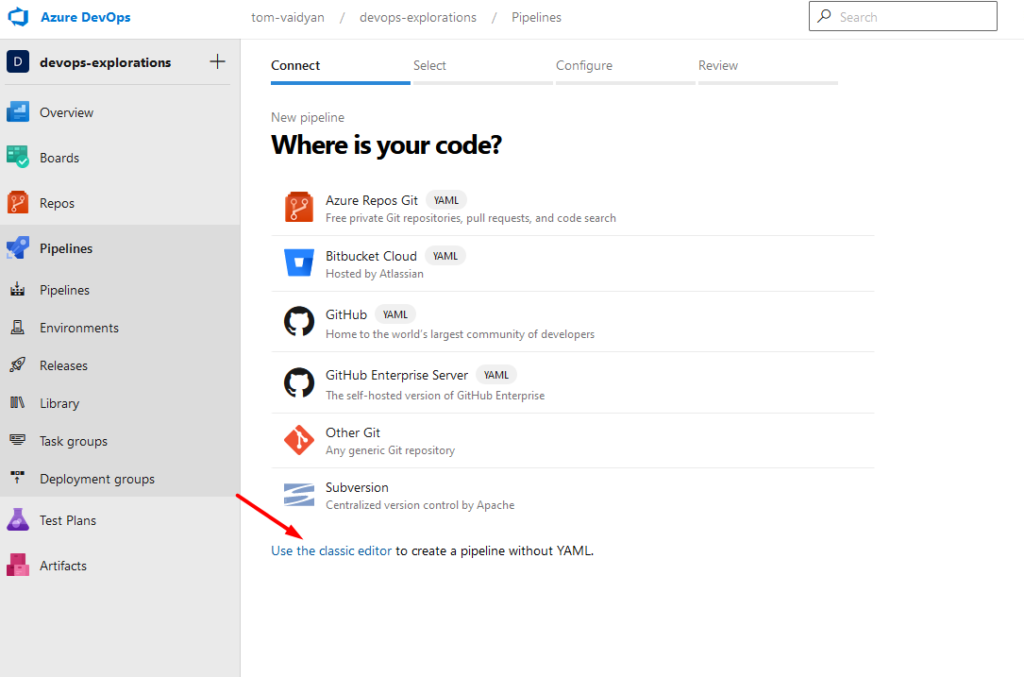
Follow the prompts to select the repository that you’d like to build a pipeline for; select the starter pipeline template to get started. However, this option will lead you to create a yaml file to represent your build pipeline which may prove to be a bit more advanced, if you’re just getting started. Alternatively, Microsoft still let’s you use its classic editor which in my opinion is a much more visual and intuitive way to create a pipeline.
Follow the prompts to select the GitHub repository and branch (that’s develop, if you’re following along) that you want to build the pipeline against. My demo application is an ASP.NET (Core) application, so I’ll pick steps that help me build and deploy such an application.
Feel free to pick another template that may more closely align with your situation. Regardless of what option you initially pick, you still have the freedom to add, remove and adjust the steps in your pipeline to get it working just the way you want.
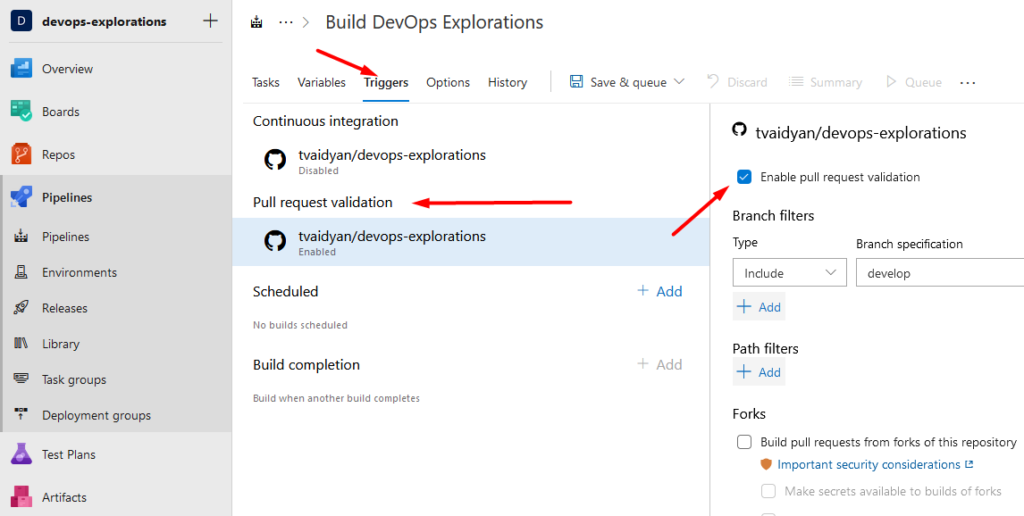
Trigger Automatic Build (when a new PR is submitted)
To trigger an automatic build when a pull-request is submitted, head over to the triggers tab and enable pull request validation:
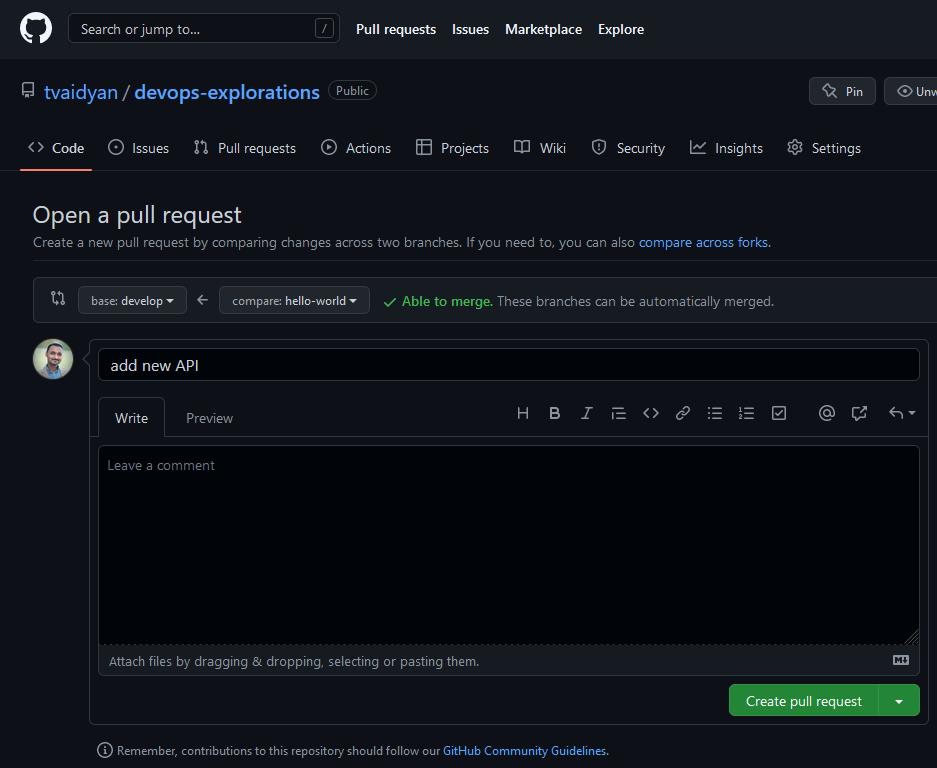
Save your build pipeline. Test by first creating a new feature branch off of the develop branch (remember, you can’t commit directly to develop), make some changes, commit, push to remote and then submit a PR in GitHub. Head over to the your Azure DevOps pipeline and you should see it automatically build.
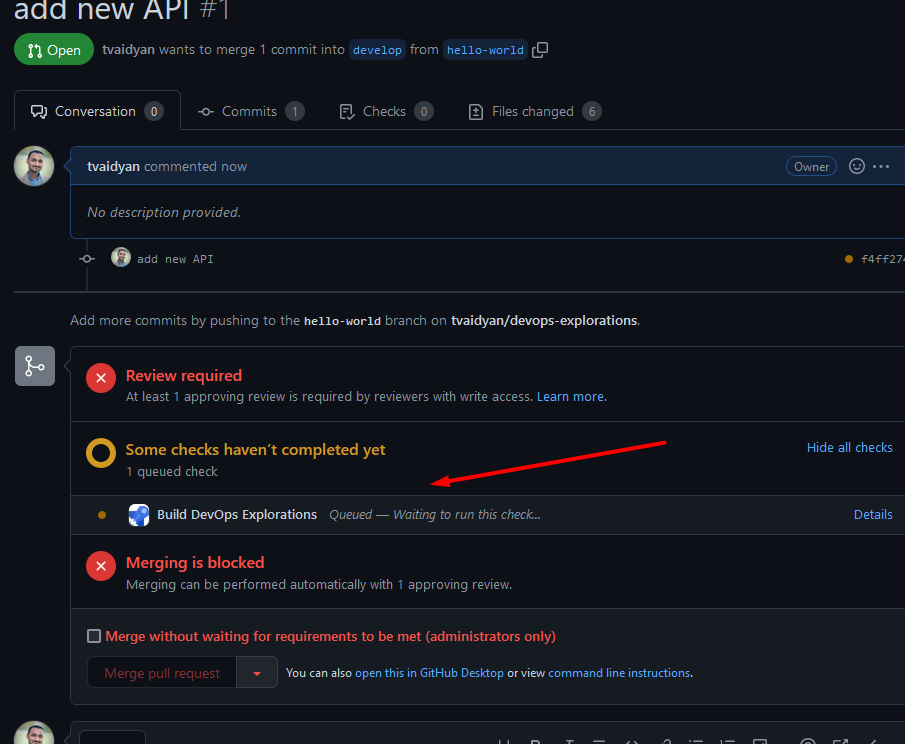
You can monitor the automated build on the Azure DevOps side, as well.
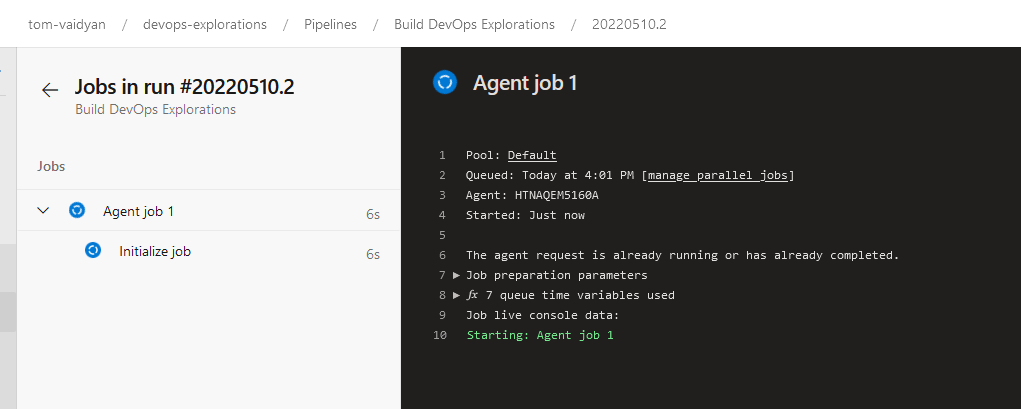
A successful build would look something like this:
Trigger Automatic Build (on code merge)
When a PR is approved and code is indeed merged to the develop branch, we want to automatically run a build and then automatically deploy it to our develop environment. For the automated build, head back to the Triggers tab of your build pipeline. Enable continuous integration. Now, whenever new code is merged to the develop branch, it will trigger a new build.
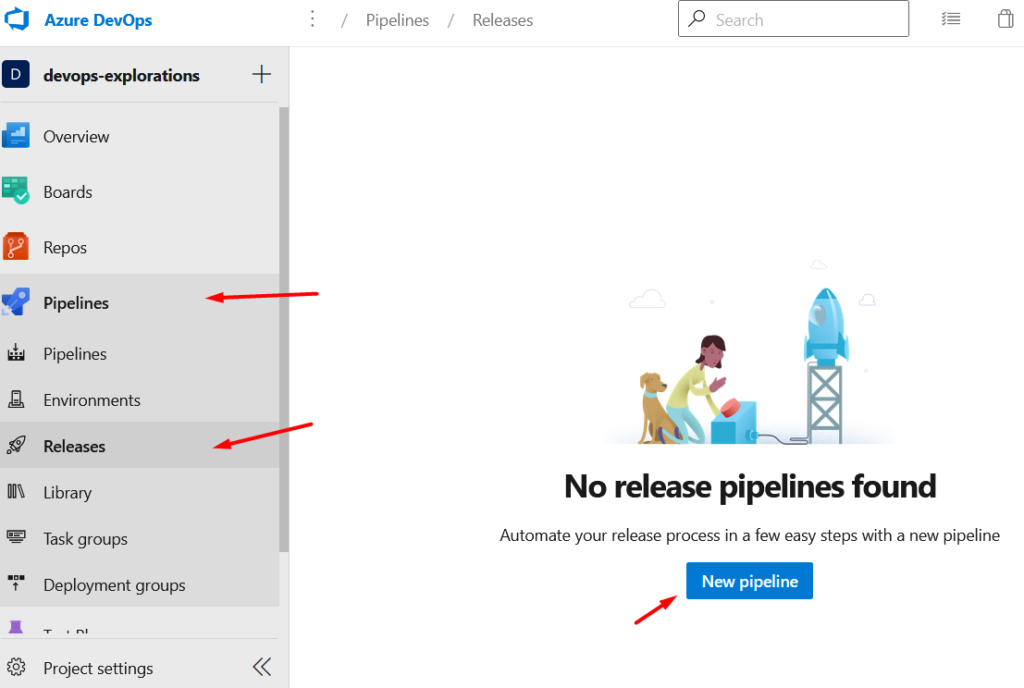
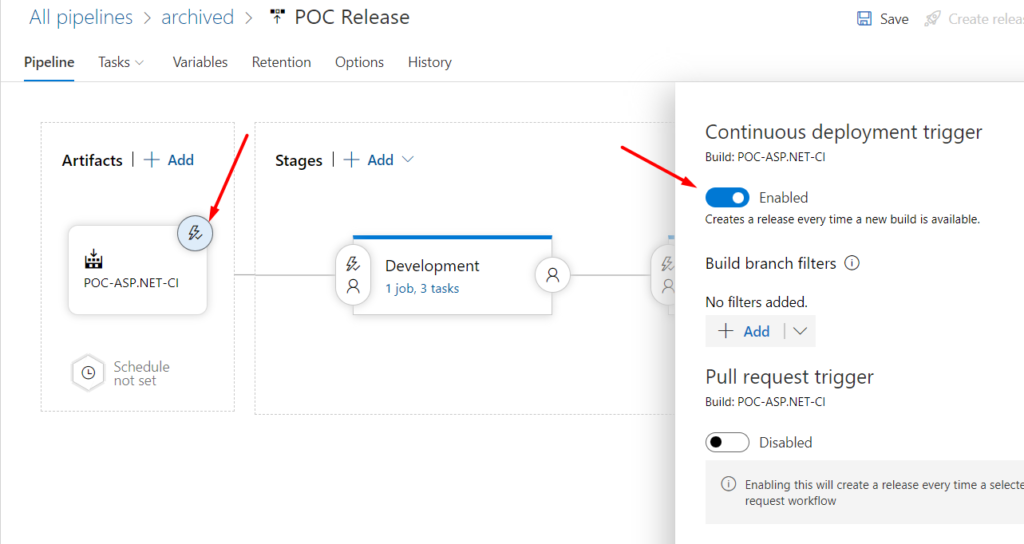
Not only do we want to trigger a new build, we want to go ahead a deploy this latest build to our develop environment. Head over to the Releases section of Azure DevOps and click the New Pipeline button to create a new one.
It will ask you what type of deployment you are planning to do. In my case, that’s to Azure App Service, a managed web hosting solution in Azure. It will also ask me to name my stage and I’ll set that to development. The only thing that I want to draw your attention to here is the continuous deployment trigger. Enabling this will ensure that a new release is completed whenever new code is merged into the develop branch.
Closing Remarks
Congrats! You now have a sweet CI/CD pipeline that auto builds and auto deploys your code to a development environment. All the other environments that I listed – staging, demo, production all work on these same principles and configurations so I’ve avoided repeating the tutorial for those other environments.