
Form Recognizer is a service offering from Microsoft Azure that recognizes forms (or more generally documents with similar structure) and can automatically extract key/value pairs and tabular data. The tool comes with a few prebuilt models that recognizes sales receipts, business cards, invoices, identification documents such as passports or driver’s licenses. Please note that these prebuilt models were trained using samples from certain countries and certain parameters and won’t be able to recognize all types of documents in all cases. You can find more details on these parameters within the documentation. Your particular use-case may fit one of those prebuilt models but more than likely, the documents that you are dealing with are unique to your organization or industry. If that’s the case, Form Recognizer still got you covered. The API surface contains a set of endpoints that allow you to train the engine with your custom forms and build custom models. This training can be done in one of two ways:
- Unsupervised: You can feed the engine with a sample set of your documents and the AI will try to pick out the format and patterns from them and build a model based on that analysis.
- Supervised: You can help the training engine by tagging the specific attributes in your sample documents which will likely lead to better results.
Microsoft has published a sample web app named the Form OCR Testing Tool (FOTT) where you can go try this service out. It’s located at Home – Form OCR Testing Tool (fott-2-1.azurewebsites.net).
At this website, you can try out your sample documents on one of the prebuilt models, have the engine try to automatically analyze the layout of your document and try to extract tables, text and labels and even allow you to create your own custom model. Below, I walk you through setting up the necessary Azure resources, connecting those resources up on the Form OCR Testing Tool website and then trying out all the different features of Form Recognizer.
Preliminary Setup (on Azure Portal)
Login to the Azure Portal. Click on “Create a new resource”, search for “Form Recognizer” and select it to provision a new instance.
There is not much to provisioning a new instance – the wizard will walk you through creating a unique name, the region, the tier and a few other items. Once the instance is created, you’ll receive a unique URL to your form recognizer instance along with a set of API keys to access them via custom code or a REST client (such as Postman).
Note: If all what you want to do is try out one of the prebuilt models, you can skip the rest of this section. All you need is to make a note of the API keys that you got when you created the Form Recognizer instance, above. But, if you want to do custom training with your own sample documents, create and setup the Azure Blob Storage resources noted below.
Azure Blob Storage: If you want to train the engine with your own documents, you must place them in an Azure Blob Storage container for Microsoft’s OCR Testing Tool to pick it up. Additionally, you must setup Cross Origin Request Sharing (CORS) to allow the same tool to pull down the documents you have stored there, across different domains. If you are unfamiliar with this process, the first step is to create a “Storage Account”. For the purposes of this demo, you can stick with the defaults.
Next, under this storage account, create a container where you’ll store your sample PDF documents for training the AI model. A container is analogous conceptually to creating a folder on a hard drive.
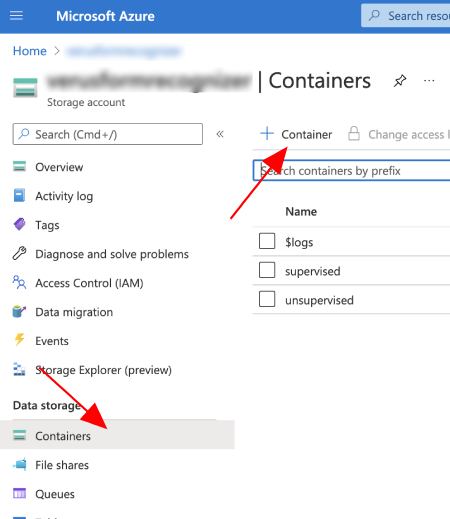
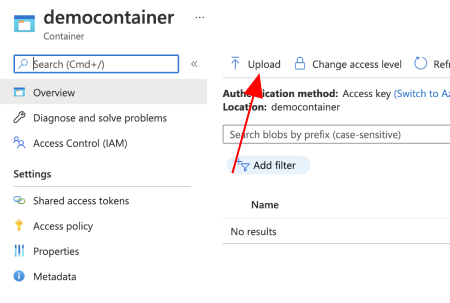
Click into the container you created and you can use the “Upload” button to upload documents from your computer into this container.
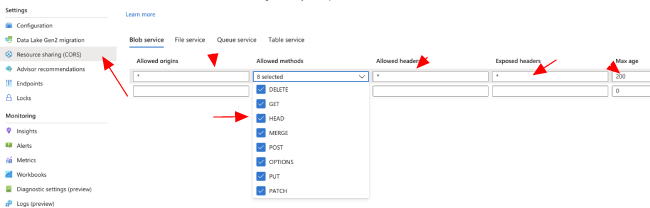
Next thing we need to do on the Azure side is to setup CORS, to allow Microsoft’s OCR tool to reach out from a different domain into this Storage container and grab files. Navigate up to the Storage Account level and then click the CORS navigation menu item. For the purposes of this demo, allow all domains and operations.
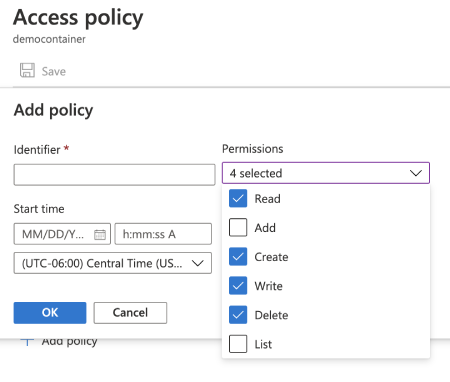
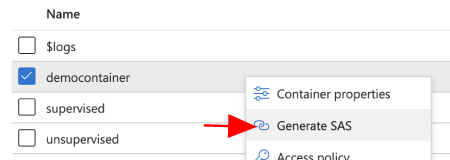
Finally, we need to generate and retrieve the Shared Access Signature (SAS) URI for your Azure Blob Storage container. In order to do so, right-click on your container and click the “Generate SAS URI” option. Make sure that you’re doing this for a specific container and not at the Storage Account level. Specify a start and end time for this leaving adequate time for you to test the features and also select the Read, Write, Delete and List permissions.
We’ve completed all the setup and prep work on the Azure side now. Now, let’s head on over to Microsoft’s Analyze Form OCR Testing Tool website and try this out.
Try Out the Prebuilt Models
From the FOTT website, click on the “Use prebuilt model to get data” option.
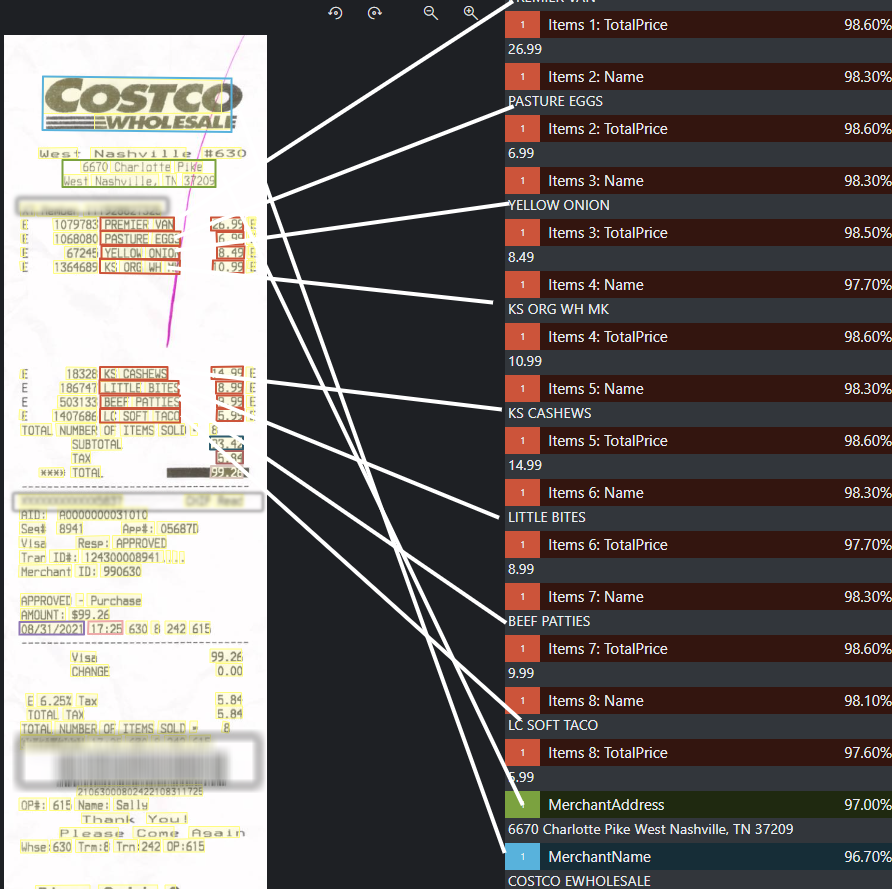
I scanned a receipt that I found lying around from Costco and fed it into the Form Recognizer engine and pressed the “Run Analysis” button.
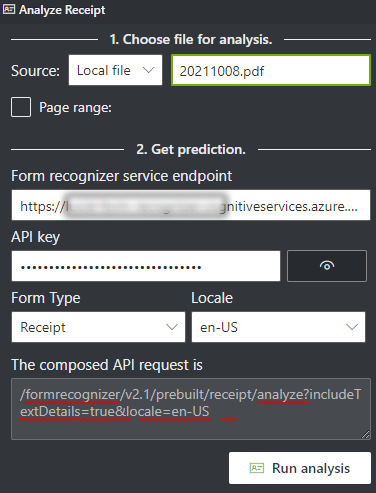
The system did a great job of extracting a lot of valuable information automatically.
Layout Analyzer
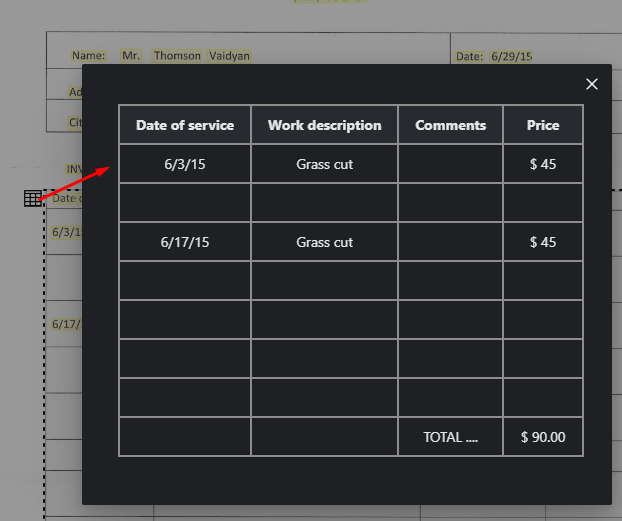
The Layout Analyzer tries to extract the structure of your documents – recognize tables, extract text based on reading order (e.g., in a two-column layout, it will extract the text from the first column, then the second column, just like how a human would read it), recognize checkboxes and whether they are checked or not, recognize both printed and hand-written text and will let you know which is which and recognize a variety of other language and structural features.
Build a Custom Model
The FOTT website also allows you to train your own custom model. Refer back to the steps that I outlined earlier in this post regarding setting up an Azure Blob Storage Container and uploading your sample documents that you want to use for this training. Once those documents have been uploaded, you can follow the steps below to load those into the FOTT web app and conduct your custom training.
Setting up a New Project
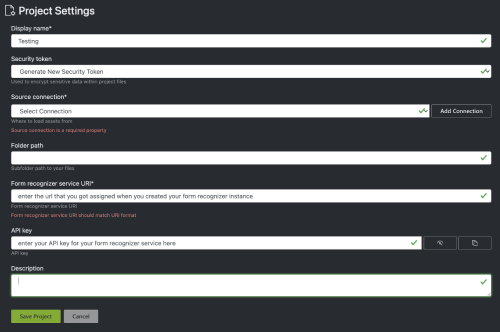
From the home page, click on “New Project”. Fill out the pertinent information based on what you setup earlier on the Azure side. As part of this, you also need to setup a “connection” which you’ll need to refer to when creating this project.
Once the project has been setup, go back to the home page and “Open Cloud Project”. It will pull in the sample documents that you uploaded to your Blob Storage Container for training.
Tagging
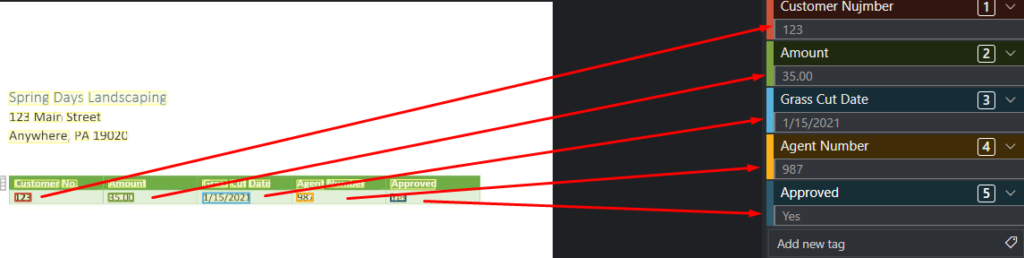
With one of these documents loaded up, use the tag editor on the right, to create tags for the relevant pieces of data in your sample form. With the newly created tag selected, click on the part(s) of your document that you want to associate with that tag. Make sure to click on the actual value and not any labels associated with those values. After the process is complete, it should like similar to what I’ve done below:
Continue this process for at least five sample documents.
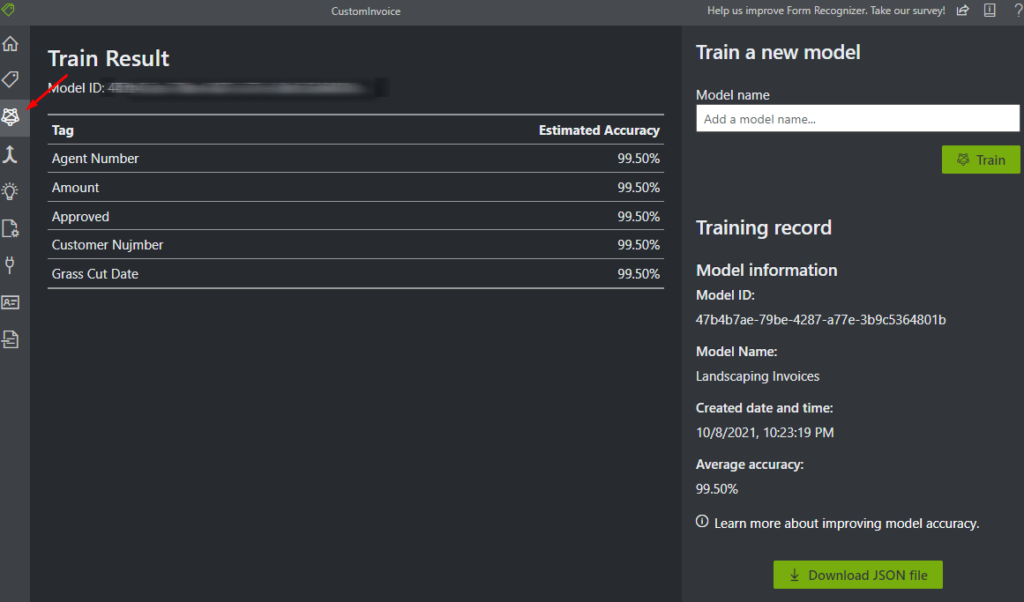
Training
Next step in the process is to train your model. Navigate to the Training screen in the application and press the button to have the engine conduct training using the documents you provided it, along with the tags you setup.
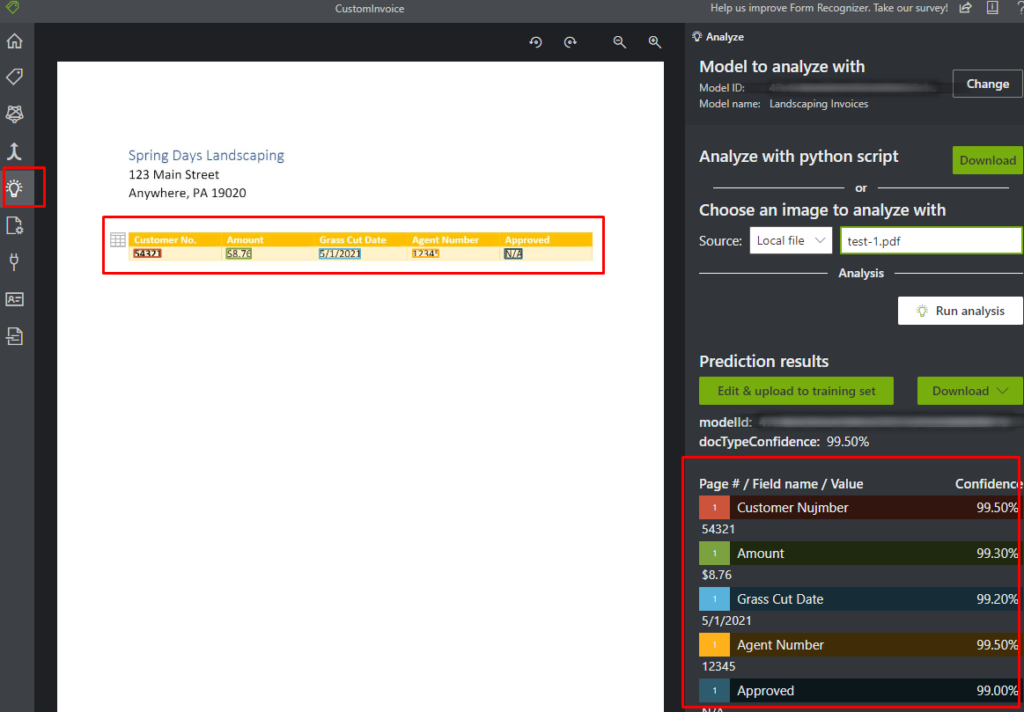
Test / Prediction
Let’s test and see if the engine is able to recognize new samples of our trained form.
Parting Thoughts
While it was neat to train your own model and test it out using FOTT, you can head back to your Azure Blob Storage Container and you’ll see that the tool has created new “label” files in the container. You can download these files and then integrate them into your custom code, interfacing the Form Recognizer API which will then provide your results, tagging the values using the labels that you have provided.
Azure Form Recognizer is a quite powerful tool and it allows even non data-scientists like me to take advantage of some AI goodness. There is a free-tier for this service that allows you to process up to 500 pages per month without any charges. Take it out for a spin and see what problems it can solve for you.