
Developing apps for iOS has never been more accessible. Xcode provides a complete integrated development environment for building, running and debugging apps written in Swift. There is some predictive code completion available in the editor, that gets you through common scenarios. With tools like ChatGPT and Gemini, the barrier of entry has never been lower. This post gives a quick overview of what you need to start building an app, test it in the simulator and on your own iPhone, and outlines a small example that fetches data from a public API.
Testing in the Simulator and on Your Personal Device(s)
The iOS Simulator bundled with Xcode lets you run your app on a virtual device. It’s fast, convenient and supports many different device sizes. It’s a great way to try out your user interface and to exercise much of your app’s logic.
At some point you will want to run your app on your actual phone. This is useful for testing performance, sensors, the camera, networking and anything else that depends on real hardware. To do this you need to connect your iPhone with a USB (once paired, you can enable a setting to connect via your local network) and add it as a run destination in Xcode.
Before Xcode can deploy builds to your device you need to enable Developer Mode on the iPhone (Settings → Privacy & Security → Developer Mode). This requires a restart and confirmation the first time you toggle it. You also need to trust the developer account on the device when you run an app signed with your personal development certificate. Xcode will prompt you when the device needs to trust your Mac; follow the steps on the device (Settings → General → VPN & Device Management → Developer App → Trust). Only trusted apps signed by your developer identity will run.
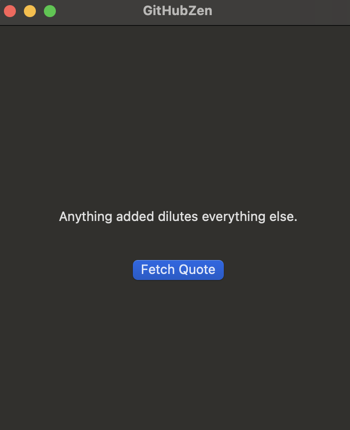
Example: Fetching Data from a Public API
Below is a simple SwiftUI example that fetches a short message from GitHub’s public Zen endpoint (https://api.github.com/zen) whenever the button is pressed. It uses URLSession to perform the request and updates the UI when the response arrives.
import SwiftUI

struct ContentView: View {
    @State private var message: String = "Tap the button to fetch a quote."

    var body: some View {
        VStack(spacing: 20) {
            Text(message)
                .padding()
                .multilineTextAlignment(.center)

            Button("Fetch Quote") {
                fetchQuote()
            }
            .buttonStyle(.borderedProminent)
        }
        .onAppear {
            fetchQuote()
        }
    }

    func fetchQuote() {
        guard let url = URL(string: "https://api.github.com/zen") else { return }
        let task = URLSession.shared.dataTask(with: url) { data, response, error in
            if let data = data, let quote = String(data: data, encoding: .utf8) {
                DispatchQueue.main.async {
                    self.message = quote
                }
            } else {
                DispatchQueue.main.async {
                    self.message = "Failed to fetch"
                }
            }
        }
        task.resume()
    }
}
When you press Fetch Quote, the app makes an HTTPS request to GitHub’s endpoint and displays the returned string. The onAppear modifier automatically fetches a message when the view first appears.
Allowing Outbound Connections
By default, outbound network connections are not allowed. Double-Click on the project name, in the navigator window, to open up the project settings. Go to the “Signing & Capabilities” tab. Under the “Sandbox” section, check the box to allow “Outbound connections (client)”. This will allow your app to reach out and make requests from remote locations.
Wrapping Up
This post covered the basics of creating an iOS app in Xcode using Swift, running it in the simulator, deploying to your own device, enabling Developer Mode and trusting your development certificate. We also looked at a simple SwiftUI example that fetches data from a public API and updates the interface with a button to re‑fetch. With these fundamentals, you can begin experimenting with more complex UI elements, APIs and device capabilities. Happy coding!