
This is the last entry in a 4–part series. Here are links to the first three:
Part 1: Create Your Own REST API Endpoints in Salesforce Using Apex REST
Part 2: Generate a New Certificate with OpenSSL for Use with Salesforce Connected App
Part 3: Create a Connected App in Salesforce as Your Apex REST API Gateway
We’ve done all the preliminary work to allow an external app to connect to our Sales force org, via the REST API endpoints that we have setup (If you haven’t been following along, checkout the earlier parts using the links above). All we have to do now is to create an external app and connect to those APIs. For that, I’m going to build a .NET 5 app as that’s what I’m most comfortable with. You can also take these same concepts and build a client app using another set of tools.
So, conceptually, what are we trying to do? We need to first authenticate against our Salesforce org and get a JWT access token; we’ll then include it in the header of all our subsequent API requests, as a Bearer token. We can certainly read the documentation and construct that initial authorization request from scratch but other developers have already done that boilerplate code in different tech stacks and have made them available to us. Since I’m using .NET, I’m going to leverage the ForceDotNetJwtCompanion nuget package. It’s an open source project and you can look under the hood, if you’re interested.
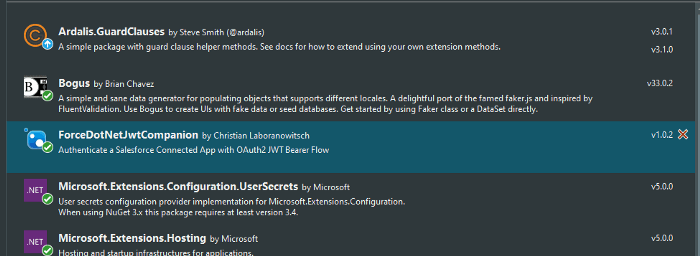
Using this library, I’m able to make that initial authorization request against Salesforce and if all goes well, I’ll get an access token which I can then include in my API calls.
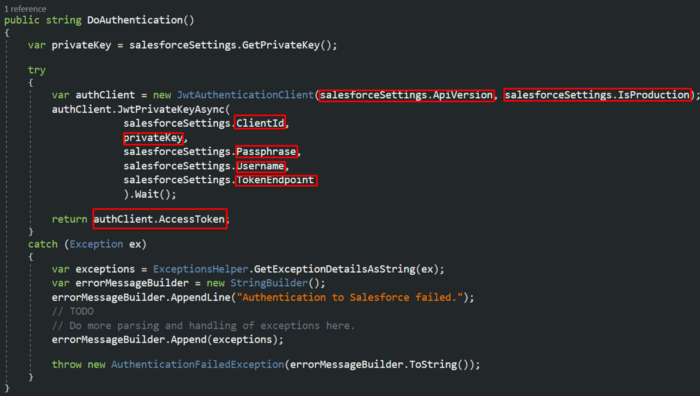
Wanted to call out the various parameters that I’m passing in:
- ApiVersion: This is added to the HTTP header to tell Salesforce, the version of their API that we’re targeting.
- IsProduction: If true, the authorization request is made to login.salesforce.com; else, it’s made to test.salesforce.com.
- ClientId: The ConsumerKey (public) that we were assigned when creating a new Connected App, within Salesforce.
- privateKey: The private key that we generated using OpenSSL when creating our TLS certificate.
- Passphrase: Passphrase that we used when generating our private key.
- Username: The Salesforce username which we’ll be using to connect to Salesforce.
- TokenEndpoint: The URL that we are asking the token from.
If our auth call succeeds, we’ll have an AccessToken that we can use to make calls to the API endpoints that we have setup.
Remember that simple “Hello World” API that I setup in Part 1 of this series, that simply returned a “Hello World” string back? Here’s how I’m invoking that API in my .NET app:
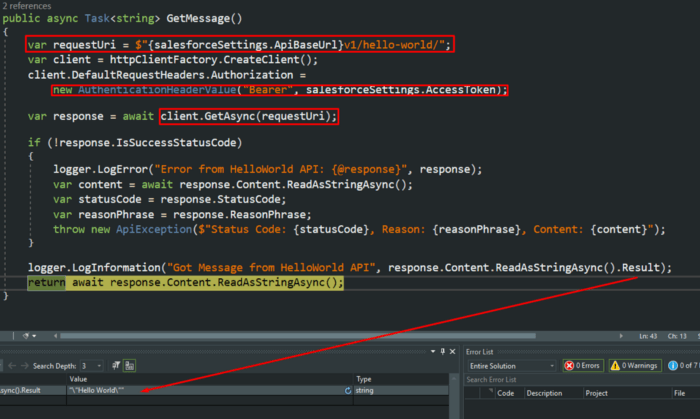
- requestUri: my “Hello World” API endpoint
- salesforceSettings.AccessToken contains the JWT token that I got from doing the authorize call. I’m adding it to the header of my current HTTP request, as part of the header, as a Bearer token.
- client.GetAsync(requestUri): invokes as HTTP GET against my endpoint.
- response.Content: contains the return payload, a “Hello World” string value.
I worked on a bit more elaborate example than a simple “Hello World” to demonstrate all the basic create/read/update/delete (CRUD) operations.
Here’s my Apex REST API class:
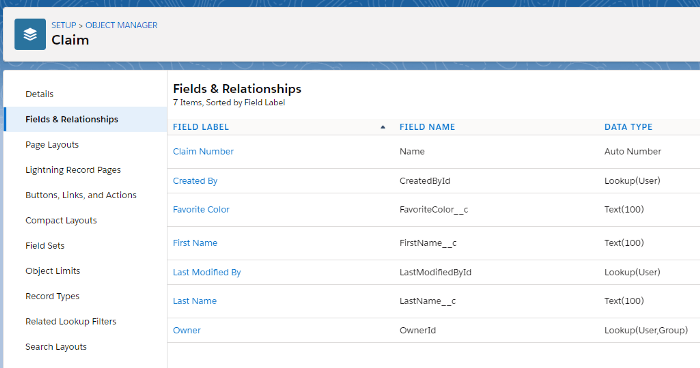
I have a simple custom object called Claim in my Salesforce org with a few text properties that the API above is coded against:
And lastly, my C# client application — I’ve hosted it on GitHub, here:
tvaidyan/salesforce-api-csharp-client (github.com)
Please feel free to download it and try it out.
Pingback:Create a Connected App in Salesforce as Your Apex REST API Gateway – Tom Vaidyan