
SharePoint can allow you to stand up a portal for your employees relatively quickly, without much technical know-how. It can serve as a knowledgebase. a document repository, a portal for news and updates relevant to your employees. But it can be more. You can also use it as a datastore for your other systems and processes. And in order to utilize SharePoint in such a capacity, you many need to access it programmatically. It comes with a nice API interface that you can invoke from other systems that understand HTTP. You may experience a little bit of friction, doing the preliminary steps – creating an ”app” in SharePoint, assign the appropriate permissions, generate the necessary identifiers that will then allow you to request for an access token.
Once you have this access token, you can make subsequent calls to interact with SharePoint lists, documents and other things that you have in SharePoint. Some of the steps involve invoking “secret” SharePoint administrative pages/screens that you wouldn’t have otherwise run into. Below, I’ll document a step-by-step guide on how to setup an app, gather required identifiers, assign permissions; how to ask for an oAuth access token and finally, how to make an API call against your SharePoint instance and pull some data back.
Setup an App in SharePoint
What we are calling “app” here is simply a reference to the outside thing – your script, your program your other system, that will be making API calls to your SharePoint instance.
To create an app in SharePoint, you have to navigate to one of the many “secret” pages of SharePoint. I’ll assume that you are logged into your SharePoint instance as an Administrator. In the same browser session, navigate to:
https://[yourinstance].sharepoint.com/sites/[YourSite]/_layouts/15/appregnew.aspxFill out the form on this page and click the “Create” button to create your app.
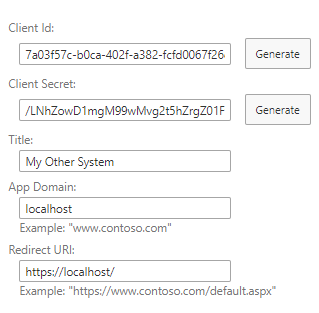
Take a note of the Client Id and Client Secret as you’ll be needing these two elements in subsequent steps. Next, visit the next “secret” page where you can setup the permissions for this new app that you created. Navigate to:
https://[yourinstance].sharepoint.com/sites/[YourSite]/_layouts/15/appinv.aspxEnter the “Client Id” that you got from the previous step as the “App Id” and click “Lookup”. The other information that you entered previously should get loaded in. Now, in the Permission Request XML box, you’ll need to enter an XML snippet. You can certainly look at the official document but this cheat sheet that I found helped me to get a condensed version.
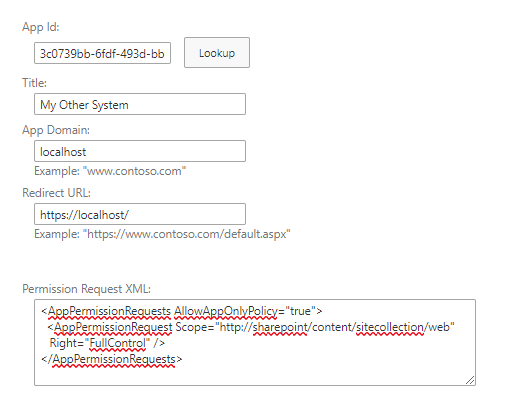
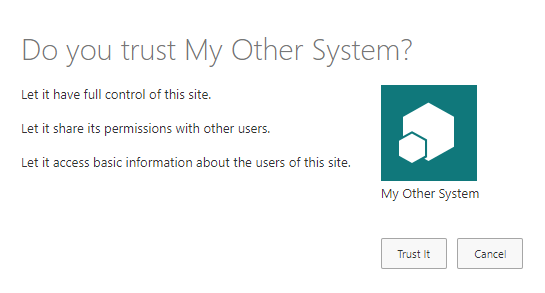
When you click “Create”, you’ll get a confirmation screen asking whether you trust “your app”. You must click “Trust It” to move forward.
Now, visit the Site Collection App Permissions page, at this URL:
https://[yourinstance].sharepoint.com/sites/[YourSite]/_layouts/15/appprincipals.aspx
On this screen, you’ll see all your apps listed, along with its App Identifier. Take note of your App Identifier, especially the GUID that appears after the @ symbol. This is your Tenant Id. We’ll need this in a later step.

One last piece of information that you need for making an Access Token request is a resource identifier and that takes the form of:
00000003-0000-0ff1-ce00-000000000000/[your-sharepoint-instance].sharepoint.com@[your-tenant-id-goes-here]The prefix “00000003-0000-0ff1-ce00-000000000000” is a static value. In other words, you can copy that value from this post and use it. You’ll use the same exact value.
Get oAuth Access Token
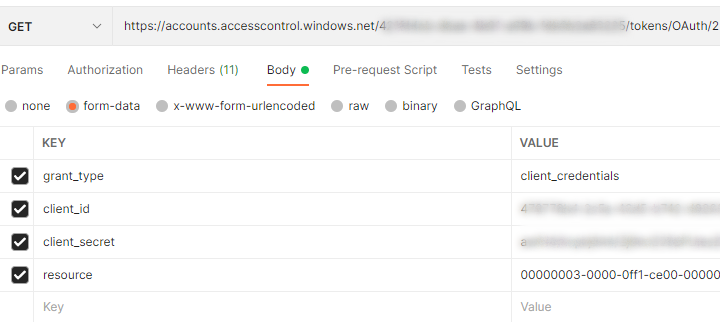
With these data elements, fire-up Postman (or your alternate API testing tool of choice… hey, I’m not judging) and setup a request to:
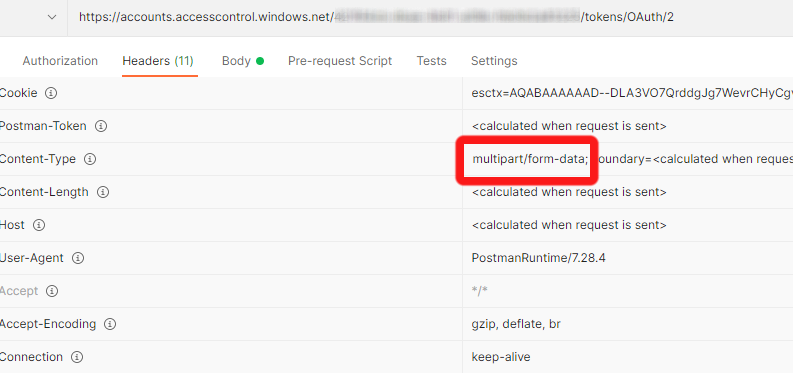
https://accounts.accesscontrol.windows.net/[your-tenant-id-goes-here]/tokens/OAuth/2My headers look like this (see below). Only thing of note is the “Content-Type” set to “multipart/form-data”. If you don’t have this set, you’ll probably get a 400 – Bad Request.
And my request body looks like the following:
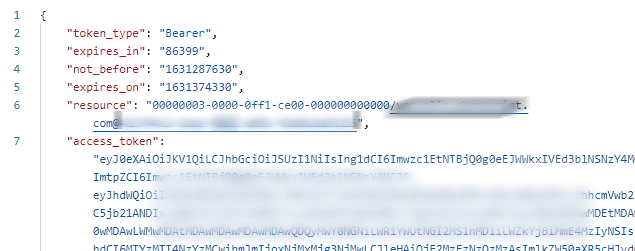
If all goes well, you should have an access token returned back to you which you can then use in your API calls to your SharePoint instance.
Make a Test API Call
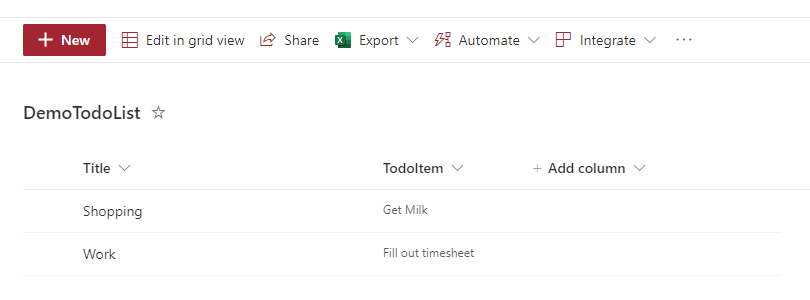
Let’s test by making a call to our SharePoint instance. For this test, I created a SharePoint List on my SharePoint site and added some values in it. I’m going to try and access this list, using the API.
You can get the contents of a SharePoint list, using the following endpoint:
https://[your-instance-name].sharepoint.com/sites/[your-site-name]/_api/Web/Lists/getbytitle('[name-of-your-list-goes-here]')/ItemsNow, when making this call, you need to place the token that you received earlier in an Authorization header like so:
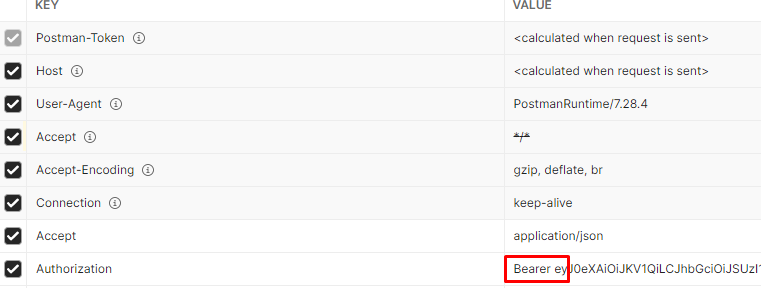
- Note the word “Bearer” and the space prior to the actual token. This is important.
- I also added an “Accept” headers to ask the API to return the results to me as JSON.
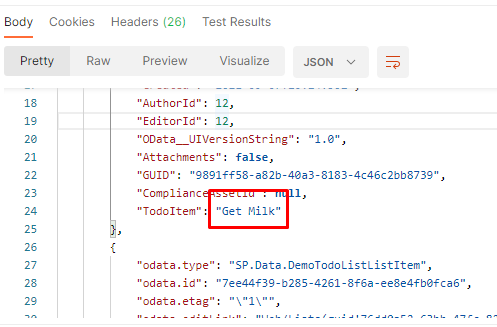
If all goes well, you’ll get the contents of your SharePoint, like so:
Parting Thoughts
The SharePoint API offering is rather rich. You can learn about all the different endpoints by consulting the documentation. Happy Coding!