
Previously, we have taken cursory looks at the Microsoft Power Platform, its components such as Power Apps, Power Automate and Power Virtual Agents. Today, I wanted to demo a more in-depth use case – generating documents dynamically. Here are the various components of this solution:
- SharePoint: We’ll use SharePoint as the repository of our input data – our mail merge data. We’ll also use SharePoint as the storage place for the files we generate.
- Excel File: We’ll use an Excel file that we’ll save in SharePoint as our simple database. We’ll add a table in this Excel file with some sample contacts. We’ll be creating documents for every row in this table.
- Word “Template” File: We’ll create a sample document using Microsoft Word. It won’t be a template in the most technical sense. It will instead contain a set of Dynamic Content Controls which we’ll bind data to, dynamically, form our Excel file.
Don’t be dismayed if your use-case or components don’t match the set I’ve selected above. That’s sort of the beauty of Power Platform. For instance, instead of relying on SharePoint to store your files, you can just as easily find connectors to OneDrive or Dropbox or Google Drive and use those instead.
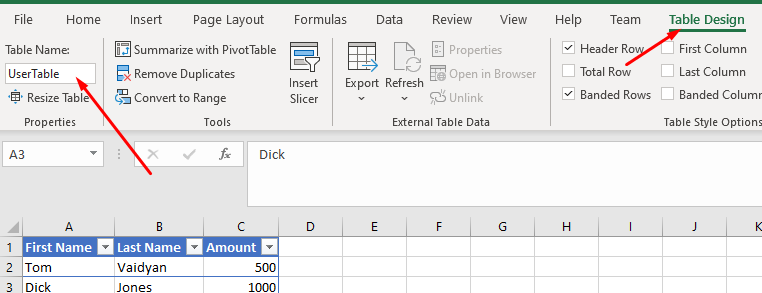
Create Excel File with Input Data
Create an Excel file with an Excel Table, similar to the one shown below. It’s important to segment the data as an actual table because the connectors that we’ll use in this solution is expecting the input data to be in a table.

You’ll note that my sample table has three fields: First Name, Last Name and Amount. I also took an additional step of giving my table a friendly name that I can easily recognize in automation connectors that I wire up, later:
Create Word “Template”
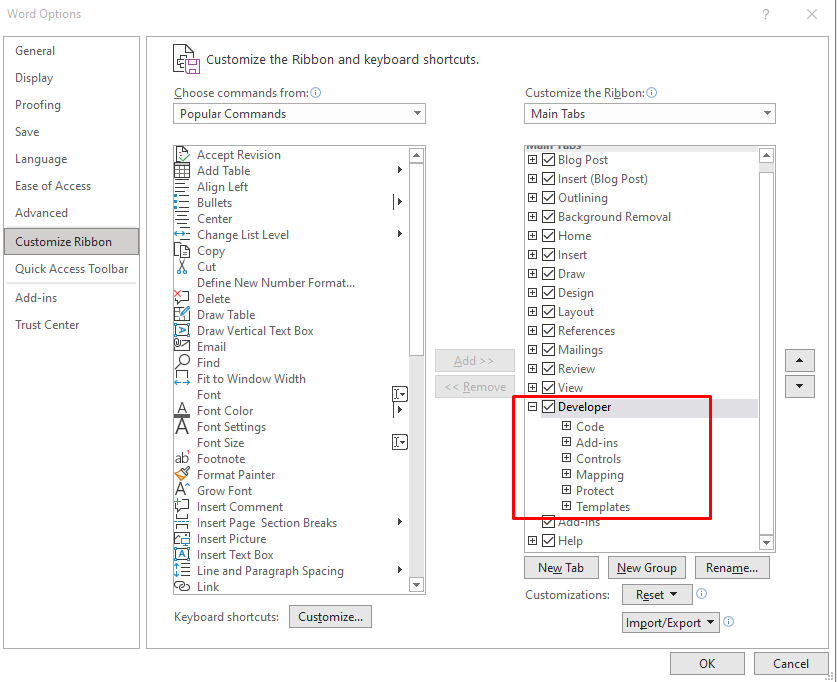
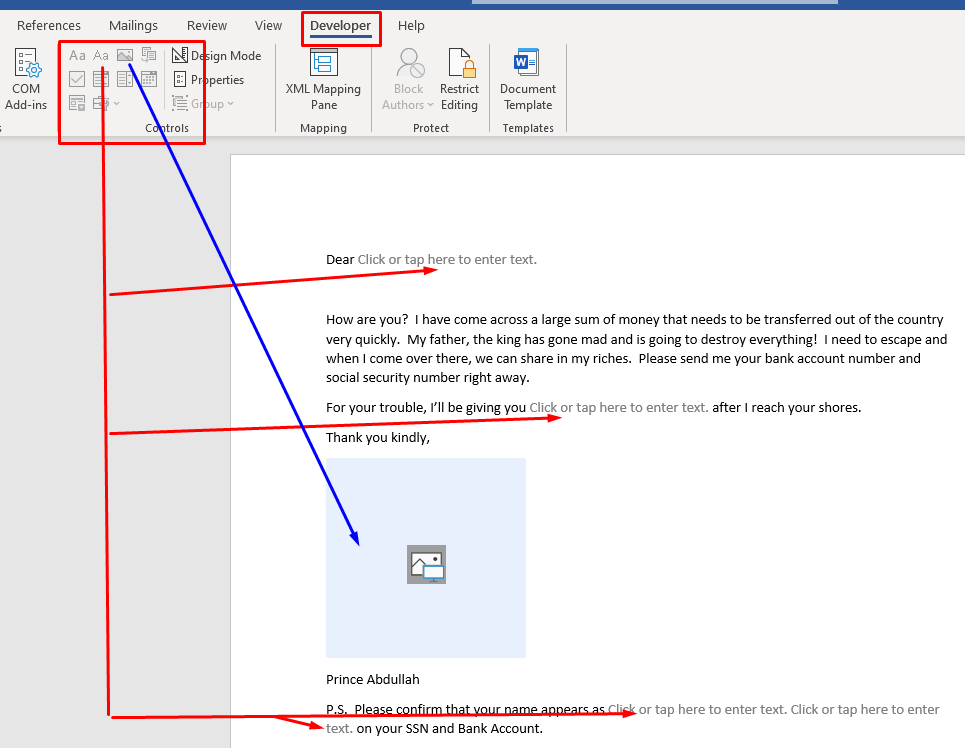
As mentioned previously, we’ll be using Dynamic Content Controls in our Word document which we’ll later data-bind to. In order to insert Dynamic Content Controls to your Word document, you’ll need the “Developer” tab enabled in Word. If you don’t see a Developer tab, go to File > Options > Customize Ribbon and add the “Developer” tab to your ribbon.
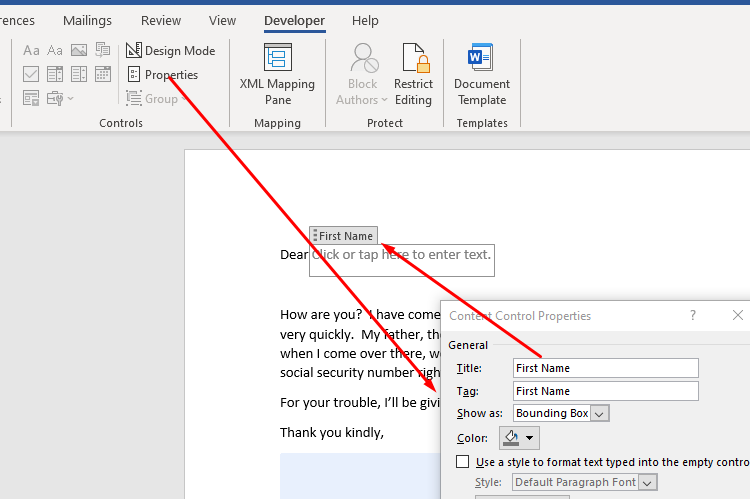
Once enabled, you’ll see a Developer tab within the ribbon and from within it, you can drag on or more dynamic content controls to add to your document. In my personal experience, as of the time of this writing (Oct 2021), I had to use the “plain text” control instead of “rich text” as only the former was supported in the Power Automate connector that I’m using in this solution.
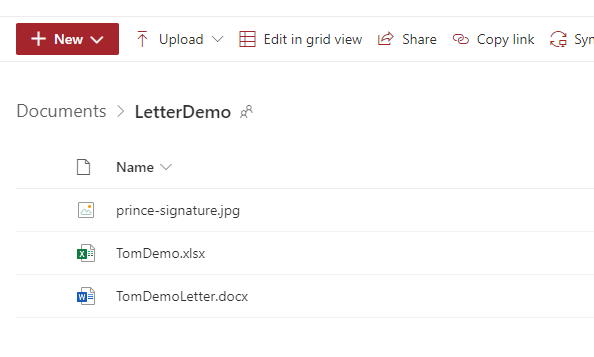
Once you’ve created your Excel file with some data and a Word file which contains the template of your generated document, place them on SharePoint in a folder of your choosing for Microsoft Power Automate to access them. I also threw in a signature.jpeg file to the mix to data bind to the image control that I have specified in my example document.
Create New Flow in Power Automate
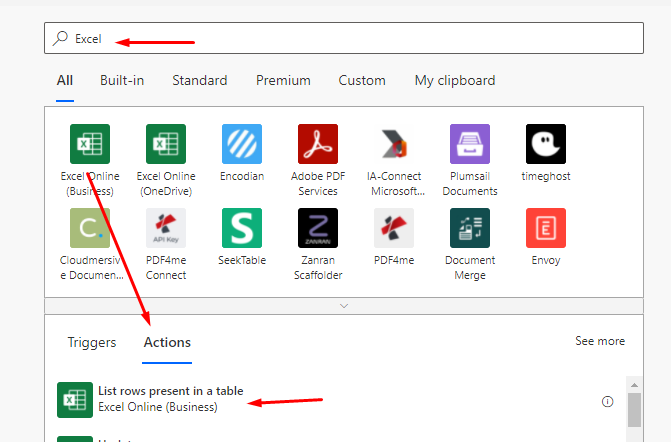
Now comes the fun part of creating an automation in Power Automate to generate these documents. I’ll start off by creating a new “Instant Cloud Flow (Triggered manually as needed)”. I’ll first specify that the trigger is “manual” by selecting the “Manually trigger a flow” connector. Next, search for Excel and select the “Excel Online (Business)” connector. Navigate to the Actions tab and pick “List rows present in a table”:
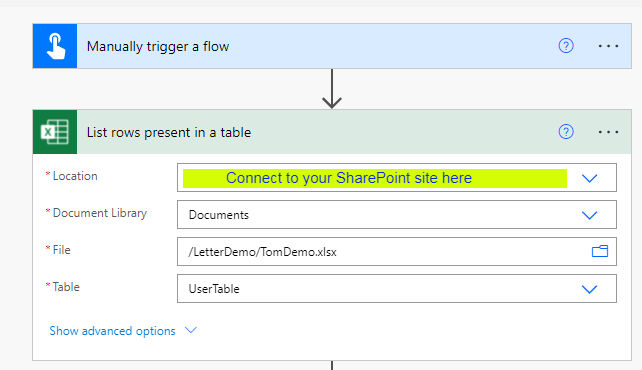
Use the location control to navigate to your SharePoint instance. Specify the “Document Library” where your Excel spreadsheet is stored, then select the actual file and lastly, pick the Excel Table that you had setup within it. Note: This is why I stressed the importance of converting your input data as an Excel Table because that’s what this connector requires (see below):
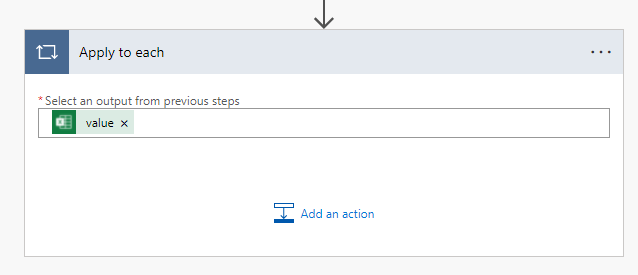
Next, search for and add an “Apply to each” action. Select the output of the previous step (values from each Excel table row):
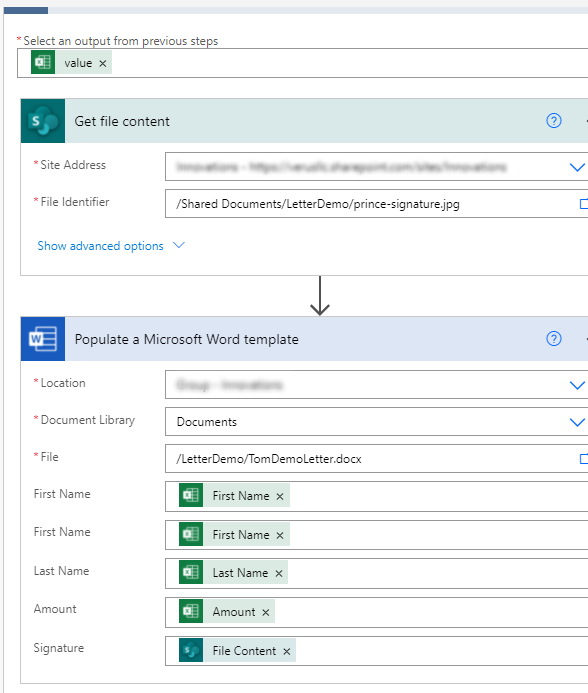
Next, search for SharePoint and select the “Get file content” connector. Point this control to the image that you have stored in SharePoint, that you want to dynamically add within your Word document. Next search for Microsoft Word and select Microsoft Word (Business), look for the “Populate a Word Template” connector and select it. Point this control to the Word document that you created earlier and saved to SharePoint. As soon as you do this, the control will update to show the dynamic control that you have created within the document. Go through each of these and point them to the corresponding Excel table value. Your flow should like something like what’s shown below:
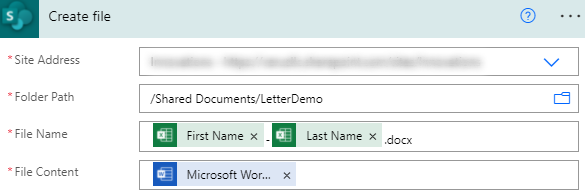
Finally, add a SharePoint “Create File” connector. Use the output of the previous step as the file content. In my example, I’m dynamically naming the file using the First Name and Last Name values that I’m pulling in from Excel.
Save and Run
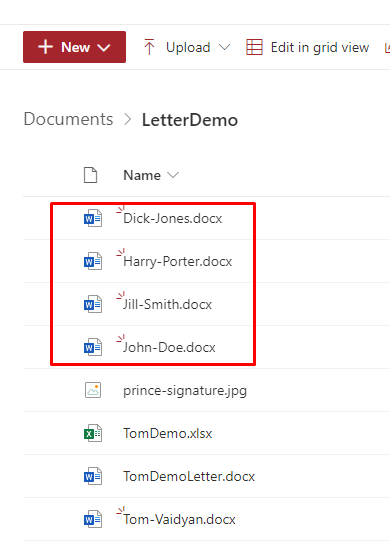
Save your flow and execute it. Navigate to the folder that you specified within SharePoint and if things go as planned, you should see new Documents in there with the names from your Excel file, like you see below.
Parting Thoughts
Please note that there may be various licensing costs associated with the connectors that you use. I’m not a licensing expert. Please do your due diligence as to what the associated costs may be. Also, as I mentioned previously, this is just an example that I put together purely for educational purposes. Your data may not reside in an Excel spreadsheet, in an Excel table. It may be in a Salesforce object, instead. Or in a SQL Server table. Experiment with some of the other connectors on this platform, swapping my own specific examples for your own specific use-cases. Perhaps you don’t want the output as a Microsoft Word file but as a PDF instead. Try adding another connector at the end to convert that Word document to a PDF file.
Am trying to use this approach for labels and so want the output in one word document and not multiple. Any suggestions?
Hi Susan, although I haven’t explored it myself, what I believe you may be after is the “repeating section content controls” in Microsoft Word. You can find the docs on it, here: https://docs.microsoft.com/en-us/office/client-developer/word/content-controls-in-word. Also search for this term in the Microsoft Power Automate Community forums and you can see posts from other power automate users discussing it in the context of Power Automate. Hope that helps!
Worked beautifully using the repeating content controls!! Thanks for the direction!!!
Hi Susan,
Were you able to include images on your labels. I am trying to get a barcode on each label, but I can’t get it to work.
Is there a way to use this word template as the body of an outlook email? I have a word template with images that generates formatted email content directly from the word document. I can’t find a way to use that generated word template as the body of the email – only an attachment. If I save the word doc as HTML, I can get the HTML and place that in the email, but the embedded images etc. then become an issue.