
You may have heard of no-code integration platforms such as Zapier and IFTTT that let you cobble together all sorts of automations and integrations without ever writing any code. You can collect all your Tweets in a Google spreadsheet. Or blink your lights when your doorbell rings. There are so many possibilities. But have you heard of Pipedream? Just like those other services, Pipedream also allows you to create all sorts of automations but this platform is geared towards developers. You can write JavaScript code, use node packages and augment your integrations. You can extract some piece of data in one step, save it into a variable and use that piece of data in a subsequent step. There is so much to love about this service. You can create a free account and run a ton of automations for free. No credit card required. The interface is very intuitive, clean and at the very same time – rich in features. Take it for a spin.
But what do you use it for?
I stumbled across this service several months ago, as I was writing an automation in Apex, on a Salesforce instance. I had to write a lot of ugly Apex code to programmatically call an antiquated third-party API with a non-standard authentication mechanism. I constructed the necessary payload, jumped through all the various hoops they made me go through in hashing and packaging up everything they wanted me to do but I had no idea if it was making it over to the other side of the wire the way I intended it to. Sure, I can go fire up Visual Studio, create an HTTP listener, publish it somewhere where my Salesforce instance can access it, have my Apex code send traffic to it instead of the third-party and then debug from there. But that felt like a lot of effort. So, I started Googling and in minutes, came across Pipedream. I setup a free account, setup an HTTP listener in a matter of minutes and I was receiving traffic on it, in record time!
So, here are a couple of ideas:
- If you want to quickly standup an HTTP endpoint to receive some traffic on, go ahead and try this service out.
- If you want to create a mock API that returns some data, that you and your team can use to quickly put together a prototype, go ahead and try this service out.
Setting up an HTTP Endpoint – Walkthrough
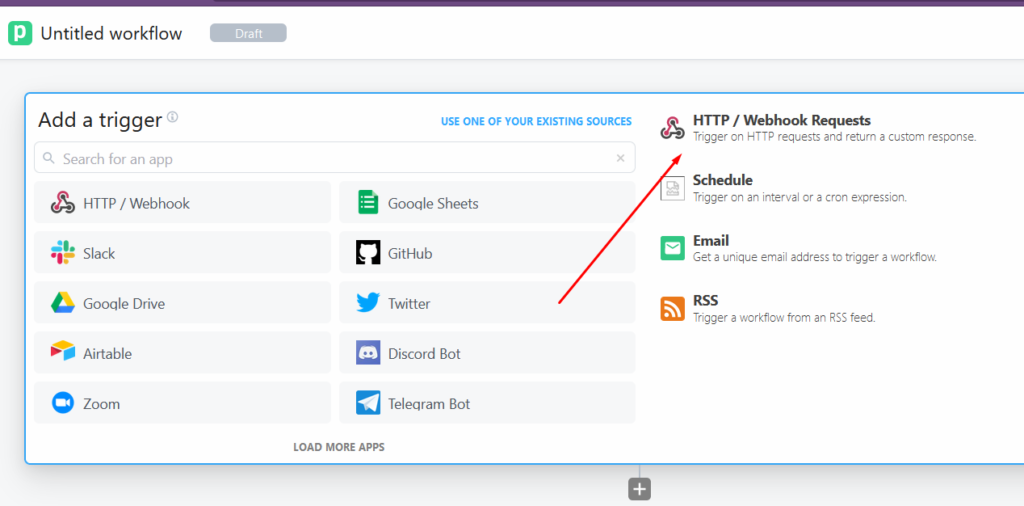
Step 1 – setup a free account on Pipedream and login. Next, from the new workflow screen, select “HTTP / Webhook Requests”.
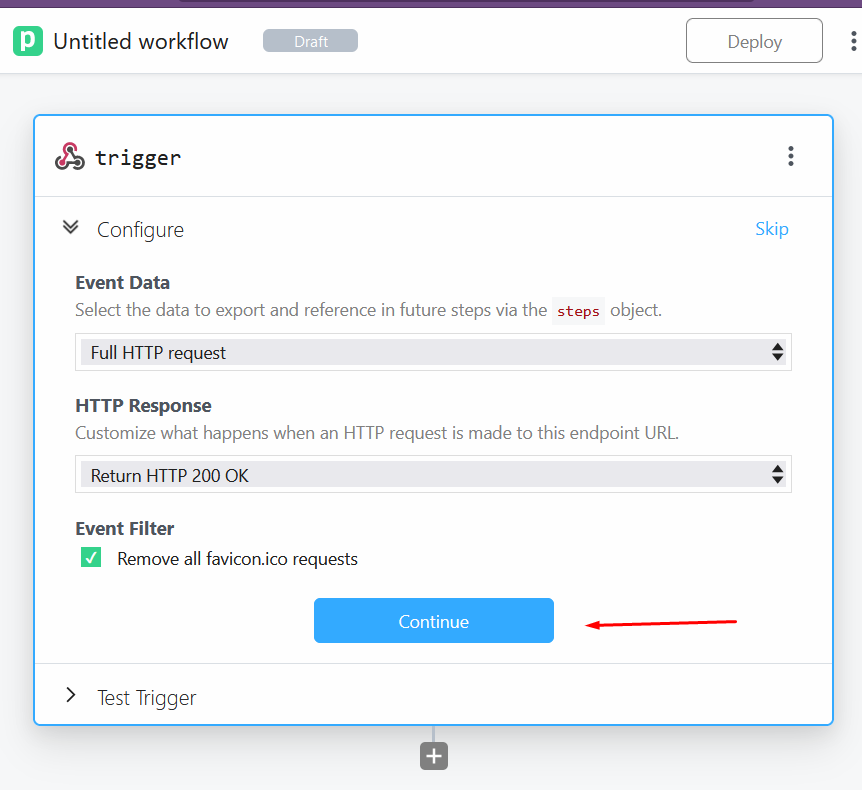
Select “Continue”.
Pipedream gives you a unique URL that you can start receiving traffic on, instantly.
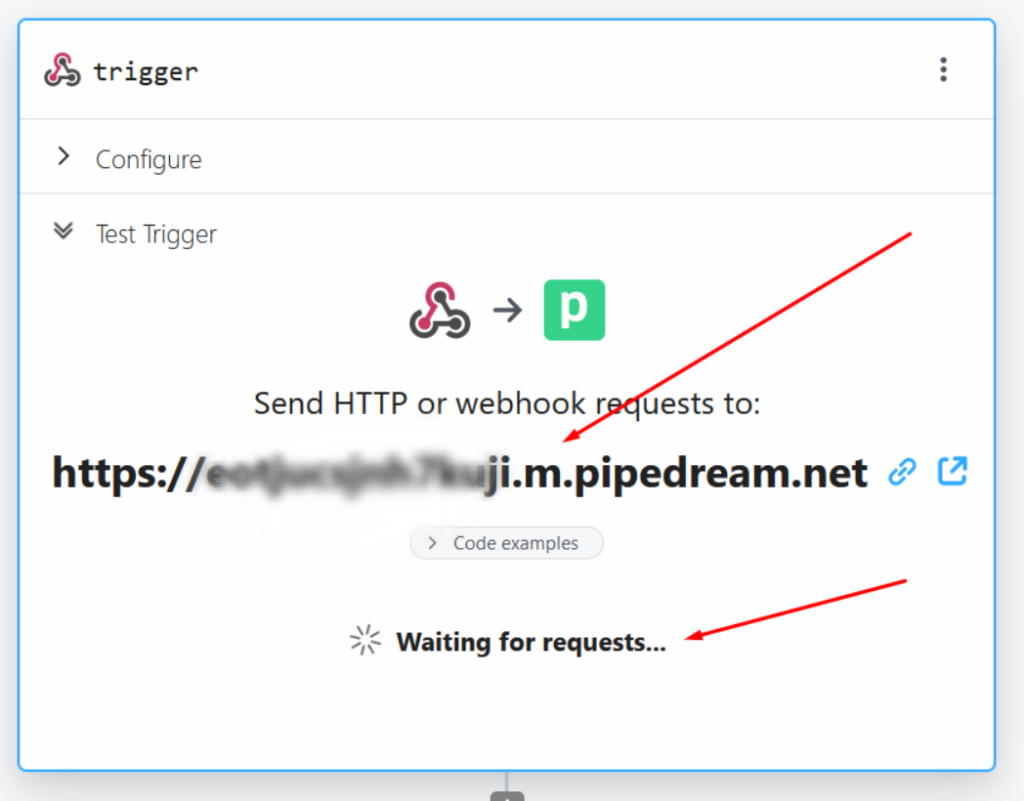
Fire up Postman or whatever HTTP API Testing tool you use and start sending some requests. And see them arrive at pipedream.

Closing Remarks
This is just one simple use-case that I demonstrated here. You can get a lot fancier. Take it out for a spin and see what you think.