
Terraform is a tool that allows you to define your infrastructure as code (IAC). Your infrastructure can be virtual machines, storage devices, network components, databases, etc. Your cloud provider may have their own way of defining infrastructure as code. For instance, on Microsoft Azure, you can use Azure Resource Manager (ARM) templates or Bicep files to do this. On, Amazon AWS, you can use CloudFormation.
However, relying on HashiCorp’s Terraform for this task may seem more appealing to you as it is a cloud agnostic solution: it works on all major clouds – namely, Microsoft Azure, Amazon AWS and Google Cloud Platform. In fact, Terraform provides abstractions over many other online properties. You can use the same (or similar) type of abstractions to target several upstream APIs. The knowledge you obtain in setting up one cloud environment can carry over to other clouds and scenarios.
Why Should I Define My Infrastructure as Code?
You may feel quite comfortable around Azure Portal or you may even have a library of Azure CLI commands saved up that you can quickly employ to build out your infrastructure. But defining them via Terraform or via another IaC solution brings about additional benefits:
- Repeatability: You can ensure that your infrastructure is built exactly like you’ve defined, every single time. You may say that I’m only building these components out very infrequently; all the more reason to use an IaC solution, in my opinion. You may build out a few environments at the beginning of a project – dev, qa, demo, prod, what have you. Six months later, you encounter a situation and you need to build out a couple of more on the side to test out some unique behavior that you can’t seem to replicate properly. Having an IaC solution in place makes this job trivial, allowing you to build out a new environment in a matter of minutes with the assurance that it matches your real environment(s).
- Traceability: Terraform files get checked in to your source control repository, along with the rest of your code. They undergo the same scrutiny and process that you place on your other code. You can compare versions, switch between them and get clarity on how things are setup from one environment to the next.
Install Terraform
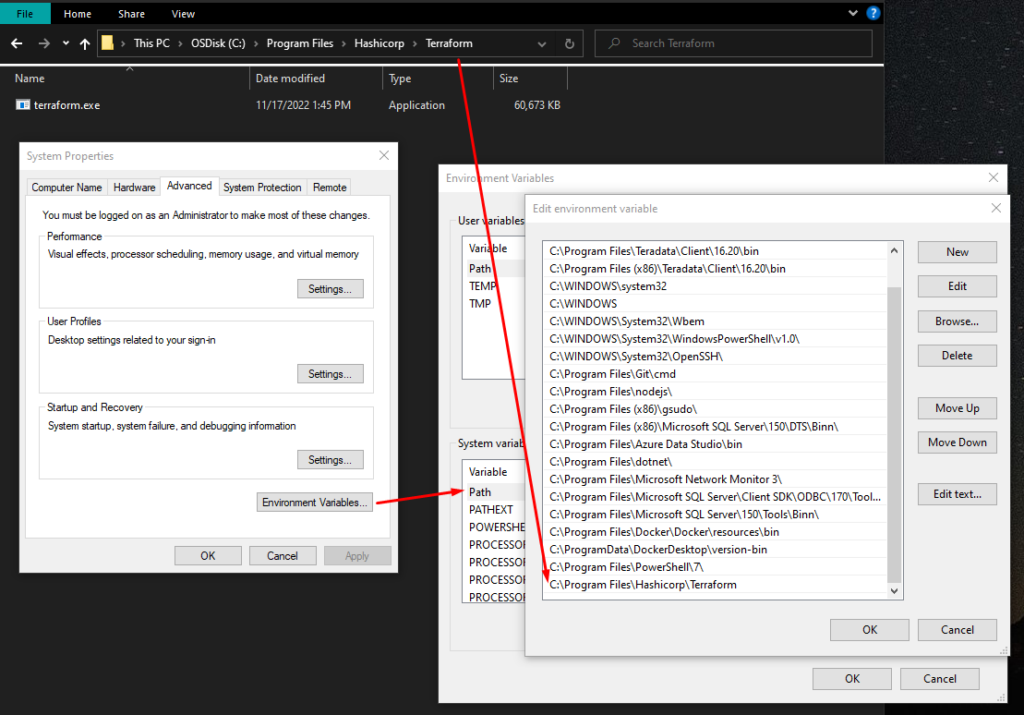
Terraform works off of a single binary. On a mac, you can brew install terraform. On Windows, you can download the zip file matching your specifications and extract it. What I recommend is to take the executable and move it from your downloads directory and place it in a structure underneath the Program Files directory. Copy the path to the executable and add it to the PATH variable in your system environment variables definitions.
To verify that the Terraform executable is in your path, open a new terminal window (yes, close any existing terminal windows and open a brand new one). Type terraform (from a path that’s different from the location where you have placed Terraform) and you should see output similar to mine.

The Terraform Language
Terraform uses a declarative style language called HashiCorp Configuration Language by which you define your end state – what you expect your infrastructure to look like – and the Terraform engine will ensure that it builds the infrastructure as you have defined it. You do not tell it how it should build that infrastructure. Based on your specifications, it will pull down the necessary underlying plugins and resources that it needs to talk to the appropriate cloud provider and makes the appropriate underlying calls with those cloud provider SDKs to build out your infrastructure resources.
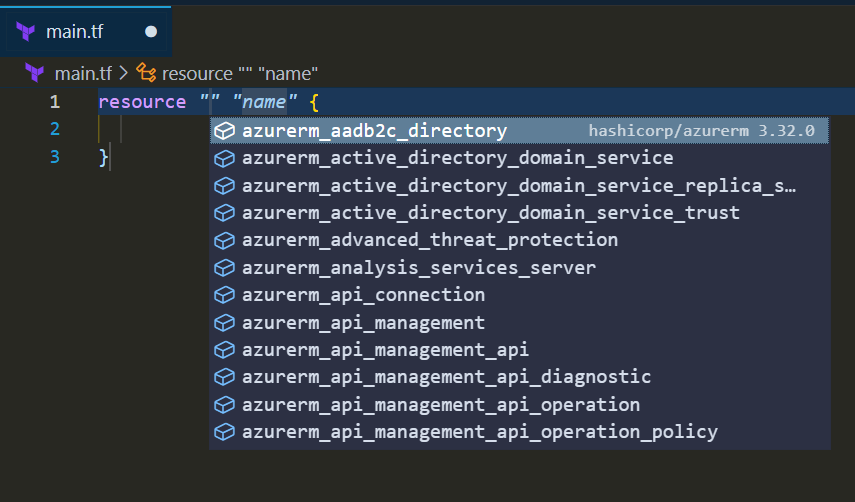
Terraform files are simple text-based files. You can work on them in any text editor. However, using an editor like Visual Studio Code provides some added benefits – you can install associated plugins that will give you code snippets, syntax highlighting and autocomplete features that will make your code authoring experience a whole lot better.
Connecting to Azure
For the purposes of this article, we’ll be using the Azure CLI to connect your local machine (the computer where you’re running Terraform) to your Azure subscription. I assume you have access to both these items and have more than a passing familiarity with the Azure cloud. With the Azure CLI installed, you can issue the az login command and it will open your default browser and take you through the authentication process. You can close the browser window after the login takes place and continue with Terraform commands. If you have access to multiple subscriptions within Azure, you can set the default subscription so that your terraform commands will target the right subscription. You can do so from the terminal by issuing az account set --subscription "your-subscription-id-goes-here".
This is only one way of giving Azure access to Terraform. This interactive form of authentication will work when working from a desktop machine but won’t be practical in an actual CI/CD scenario where a foreign machine somewhere is running Terraform on your behalf. In such a scenario, you’ll want to use a service principal. That’s beyond the scope of this article. Stay tuned for a future post where we can explore running Terraform from an Azure DevOps pipeline.
Show Me The Code
For this demonstration, let’s create two resources in our azure subscription:
- A Resource Group: All resources in Azure must belong to a resource group which is simply a logical container.
- A CosmosDb Instance: A managed NoSQL database.
We’re utilizing azurerm, Terraform’s Azure Provider, for this purpose. You can apply the same learning to create virtually anything in Azure. Checkout Terraform’s Azure Provider Documentation for more examples. You can also check out this official examples repo on GitHub for several more examples.
Let’s start with the most basic example which will require us to create just one file – main.tf.
provider "azurerm" {
   features {}
}

resource "azurerm_resource_group" "resource_group" {
  name     = "terraform-demo-rg"
  location = "eastus2"
}

resource "azurerm_cosmosdb_account" "database" {
  name                = "tf-demo-cosmosdb"
  location            = azurerm_resource_group.resource_group.location
  resource_group_name = azurerm_resource_group.resource_group.name
  offer_type          = "Standard"

  consistency_policy {
    consistency_level       = "BoundedStaleness"
  }

  geo_location {
    location          = azurerm_resource_group.resource_group.location
    failover_priority = 0
  }
}
In the file above, we’re defining two resources – a resource group and a cosmos db instance. Both these definition takes the form resource [resource type name] [local name]. azurerm_resource_group is the resource type name for a resource group and azurerm_cosmosdb_account is the resource type name for a CosmosDb instance. You can find all the resource type names and all the possible attributes within each, in the azurerm provider documentation. The resource type keyword is follow by a local name – “resource_group” and “database” in our example. These are aliases that we are creating for those resources. You can use these local name aliases to refer to them, elsewhere in this same file. You can see that in the example where we refer to the resource group’s name and location properties when defining our database. We are stating that the database must be created in the resource group that we defined earlier, and must be placed in the same Azure region as the resource group itself.
For the creation of a resource group, I had to specify a name and a location. For a CosmosDb instance, I also had to specify the resource group name, the offer type, consistency policy and a geo location. Those are the bare minimum specification requirements for the creation of such a database. The documentation defines all the required and optional parameters for each resource type.
Now, let’s try it out.
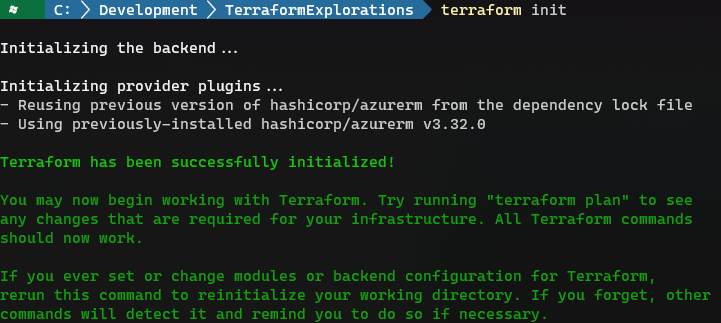
First we must initialize this file by issuing the terraform init command. This allows terraform to inspect our file and pull down the necessary modules it needs to do the work that we have defined within it.
Next, let’s do a terraform validate to ensure that our file does not have any syntactical errors.

Let’s also issue a terraform plan to get a preview of the work that Terraform will do.
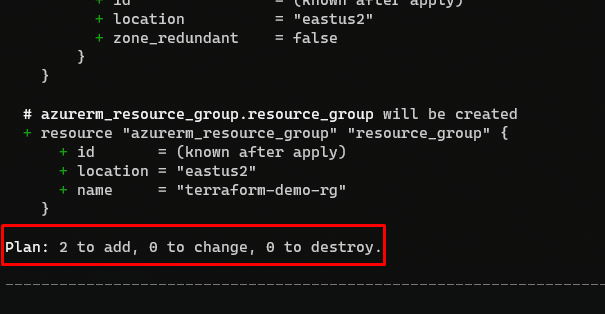
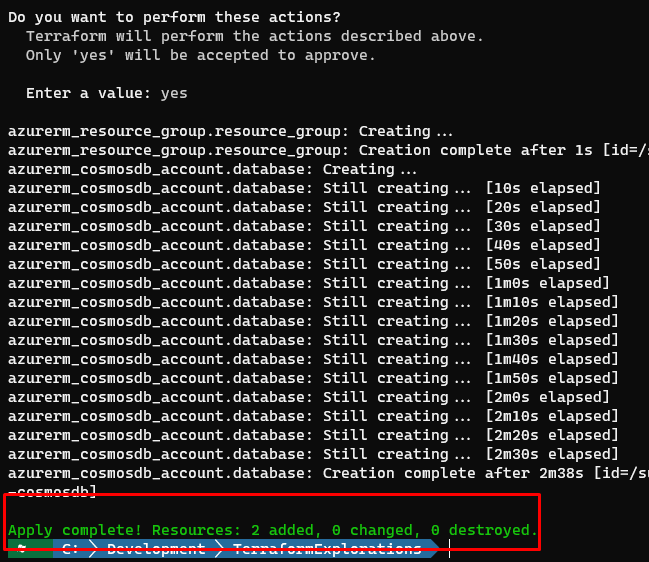
Let’s go ahead and execute this plan. To do so, issue the terraform apply command. If all goes well, you should see output similar to mine.
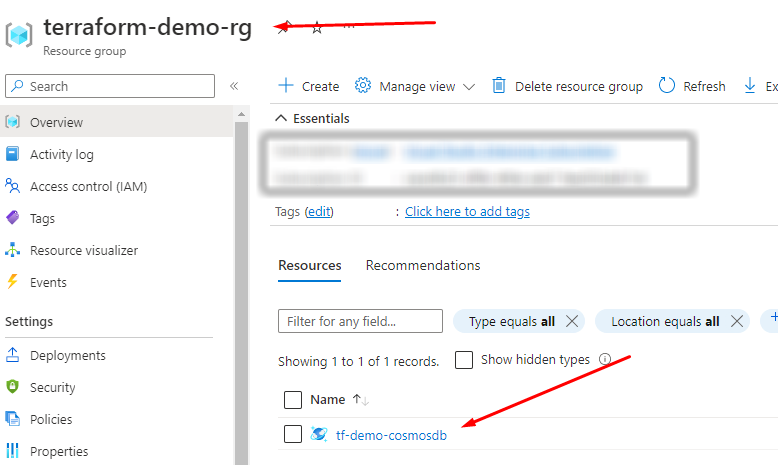
Navigate to the Azure portal and confirm that the resources you created are indeed there.
Note that this is only an introductory post, demonstrating a very rudimentary example. In real-world usage, you should follow best practices such as defining modules and using variables, instead of hard-coding all the input parameters.
Clean Up
If you’ve been following along, you should clean up the resources you create so that they don’t hang around, costing you precious dollars. You can do that via terraform, using the terraform destroy command.
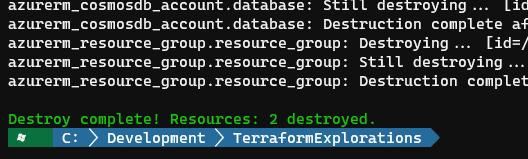
Double-check via Azure portal and confirm that you have nothing lingering around that you no longer need.
Parting Thoughts
Please allow me to get on my soapbox, for a minute.
Some of us here will fondly remember the good ol’ times when we got a physical server shipped to us on which we loaded up a bunch of software, and mounted it on a rack in the server room, in our building or in a colocation facility, nearby. We warmly reminisce about the cold, sterile atmosphere of that server room juxtaposed against a rats nest of Ethernet and power cables in the back. Fast forward a few years and we are now technically “in the cloud” but all we did was make virtualized copies of our existing machines and carried over our old practices to the new world. We still manually RDP’d into machines, setup IIS and setup configs.
I sincerely hope you’re not doing that anymore. But if you are not there yet, that’s okay. You don’t have to be too hard on yourself. Simply know that there are better ways to build and deploy code. And as you hopefully got from today’s episode, there are better ways to build our infrastructure itself – the servers and services that run our code.
** gets off the soapbox **
Stay tuned for a future episode where we’ll integrate Terraform within an Azure DevOps deployment pipeline.