
In today’s dynamic world of application development and deployment, containerization has emerged as a game-changer. It provides a scalable and portable way to package and run applications, making it easier to manage complex software environments. In Azure, there are a handful of ways that you can leverage docker containers. You can always create your own docker infrastructure using virtual machines. If you don’t want to do that from scratch but want the ultimate power and flexibility, you can use Azure Kubernetes Service. It’s a fully managed Kubernetes solution in the cloud. Then there is Azure Container Instances service. If Kubernetes, even a managed one seems daunting, ACI is probably a good start for you. While we’ll look at all these options in future installments, today we’ll look at how we can run our docker containers in our beloved web application infrastructure – Azure App Service. While we’ve traditionally used App Service as our web hosting platform in the cloud, serving up our .NET, Node, Java, Python, Ruby, PHP and even our static HTML apps, we can also stand up a container solution that can be proxied through App Service. Let’s explore the benefits and capabilities of this option.
Understanding Containers
Before diving into Azure App Service’s container support, let’s briefly recap what containers are and why they’re so valuable:
Containers are lightweight, standalone, and executable packages that include everything needed to run a piece of software, including the code, runtime, libraries, and system tools. They offer several advantages, such as:
- Consistency: Containers ensure that applications run the same way in different environments, reducing the “it works on my machine” problem.
- Isolation: Containers isolate applications from the host system and each other, enhancing security and stability.
- Portability: Containers can run anywhere that supports the container runtime, whether it’s your laptop, on-premises servers, or cloud environments.
Azure App Service Container Support
Azure App Service leverages the power of containers by providing a seamless environment for deploying and running containerized applications. Azure App Service supports Docker containers, which are widely adopted and well-documented. You can easily package your application and its dependencies in a Docker image, making it compatible with Azure App Service.
Use Cases
Container support in Azure App Service opens up various use cases:
- Modernizing Legacy Apps: Lift and shift existing applications into containers to benefit from enhanced portability, scalability, and management capabilities. While Azure App Service natively supports a variety of popular languages and frameworks, your app maybe written in something else. However, you can simply containerize that application and provide it to Azure App Service and it can host it without having to reconcile the implementation details of your app.
- Microservices: Deploy microservices-based architectures, breaking down applications into smaller, manageable components.
- Dev/Test Environments: Create isolated development and testing environments for teams, ensuring consistent environments for application testing.
- Hybrid Cloud: Easily move applications between on-premises and cloud environments or between different cloud providers.
How Do I Do This?
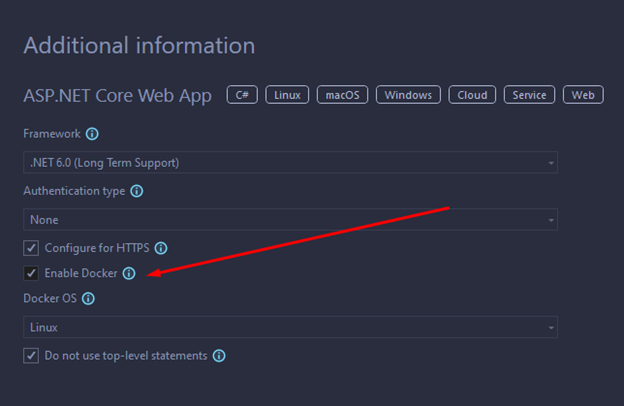
Let’s look at a simple example. Firstly, you’ll need a docker image that contains your app that you publish to a docker registry (we’ll be using Azure Container Registry in this example but you’re free to use other ones). If you don’t have one handy, you can use Visual Studio to create a Hello World dotnet application. During creation, check the “Enable Docker” checkbox and it will add a Dockerfile to your solution from which you can build a docker image.
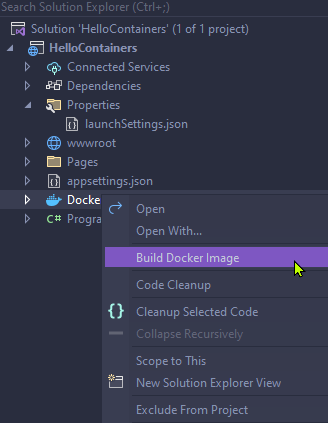
Visual Studio will/should automatically build the Docker image for your when running your application but you can also explicitly do this by right-clicking on the Dockerfile in your solution explorer and utilizing the “Build Docker image” option.
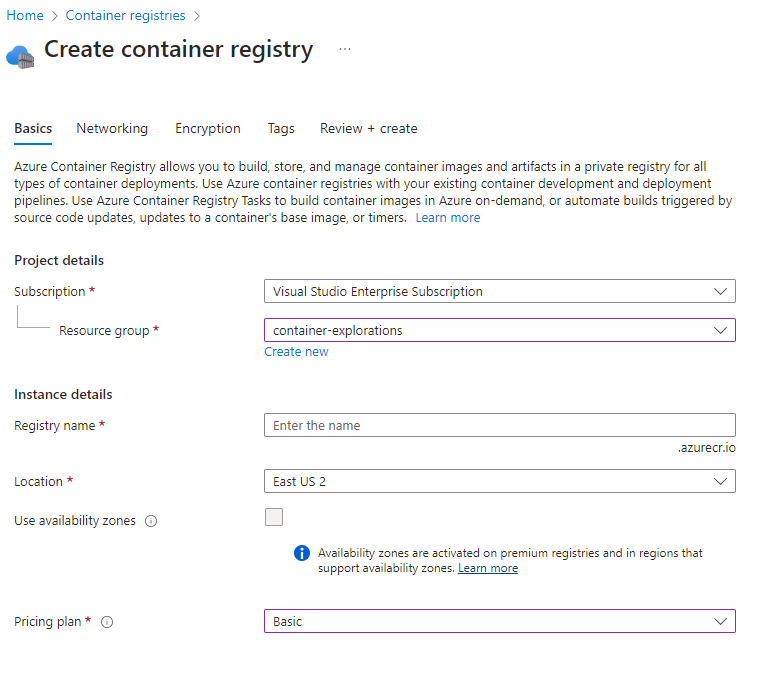
Now that you have a Docker image, next step is to put this Docker image somewhere that Azure App Service can access it. You’ll need a container registry. In Azure we have the Azure Container Registry for this purpose. You can search for this in the Azure portal and set one up by providing a unique name and a couple of other basic details.
Tag Your Docker Image
Before we push our docker image to the Azure Container Registry, we must set a tag on the image as prescribed by ACR:
docker tag [your image name] [your ACR name].azurecr.io/[rest of the tag]The main thing to note here is that your tag name must begin with your ACR DNS name.
Login to ACR
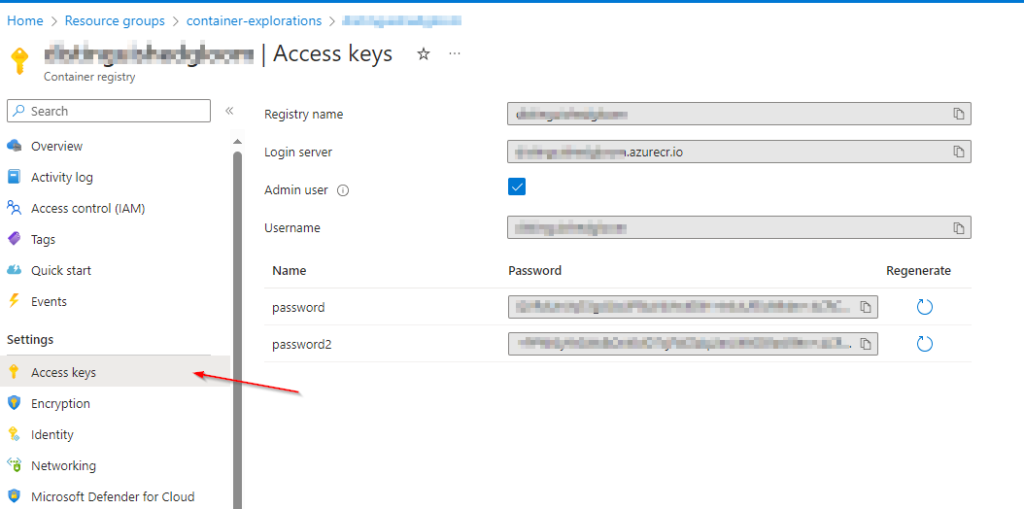
One method of authenticating against your ACR is by enabling “Admin user” access for your container registry. Then you can login to your ACR from your terminal, via the Azure CLI, with the username and password that’s provided there, on the portal.
In your terminal, issue the following command to login to your ACR
az login # to authenticate to Azure, if you haven't already done so
az acr login --name your-acr-name
Push Your Docker Image to ACR
You can push your docker Image to Azure Container Registry by using the Azure CLI.
docker push [your ACR name].azurecr.io/[rest of the tag]To see a list of docker images that exist in your registry, use the following command.
az acr repository list --name [your ACR name] --output tableHost Your Containerized App in Azure App Service
To publish your containerized app in App Service, it must have permissions to pull that image from your container registry. Since you enabled “Admin user” access for your container registry in an earlier step and those credentials are stored in session, you should not have any issues with the following deployment step. However, note that you can also setup a managed identity for your ACR and then authorize access to that managed identity from your Azure App Service.
Creating the web app from your docker image is simple as running this command:
az webapp create --resource-group [your-resource-group] --plan [your-app-service-plan] --name [a-unique-name-for-your-app] --deployment-container-image-name [your-acr-dns-docker-tag-you-made-earlier]Deployment should only take a few seconds. Navigate to your resource group or your app service plan and you should see your new app created and running.
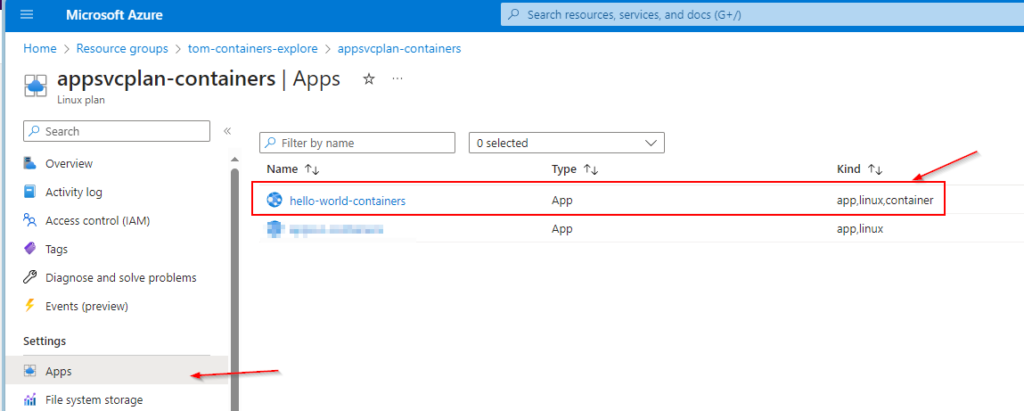
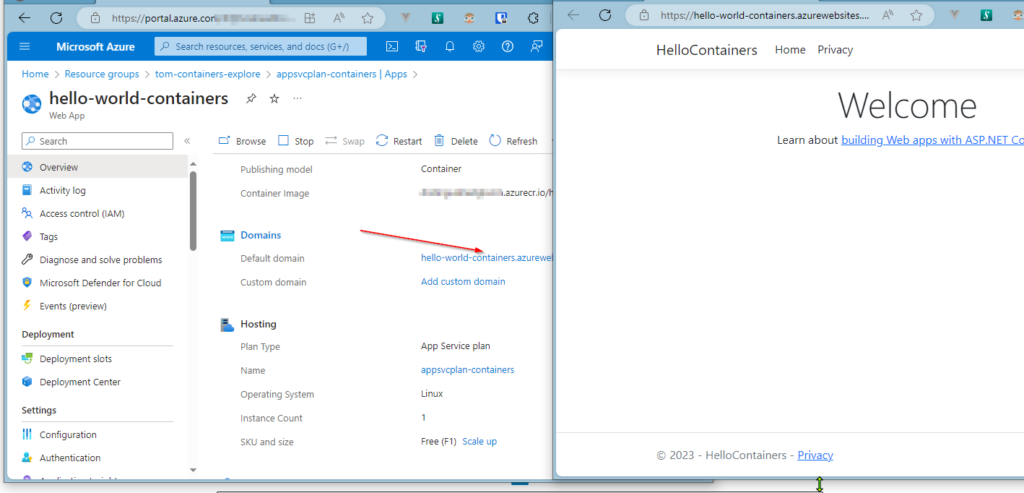
Navigate to that app and click on the DNS entry to see it running in a browser.
Closing Thoughts
Container support in Azure App Service empowers developers and organizations to harness the full potential of containerization while simplifying the deployment and management of containerized applications. With its seamless integration into Azure’s ecosystem, you can leverage Azure’s monitoring, scaling, and CI/CD capabilities to streamline your development process.
Whether you’re building modern microservices architectures or migrating existing applications to the cloud, Azure App Service’s container support is a powerful tool that can help you achieve your goals efficiently and reliably. In future installments, we’ll look at some other ways we can leverage the power of docker and containers in the Azure cloud.