
Azure App Service provides a solid, no-fuss way of hosting your ASP.NET apps in the Microsoft Azure Cloud. It makes scaling up and scaling out a breeze, provides good useful UI for adding App Settings, Connection Strings, CORS Settings and more, integrates well with identity providers, and provides very elegant integrations with other Azure services such as Application Insights, Azure Monitor, Managed Identity and others. As a web developer, I have great praise and appreciation for this service.
But sometimes, you miss that fine-grained control that you get with hosting the app yourselves, on your own server, on your own copy of IIS or another web server, where you have full filesystem access, where you can see and touch and play with everything. What do you do when your App Service app in the cloud is not starting up?
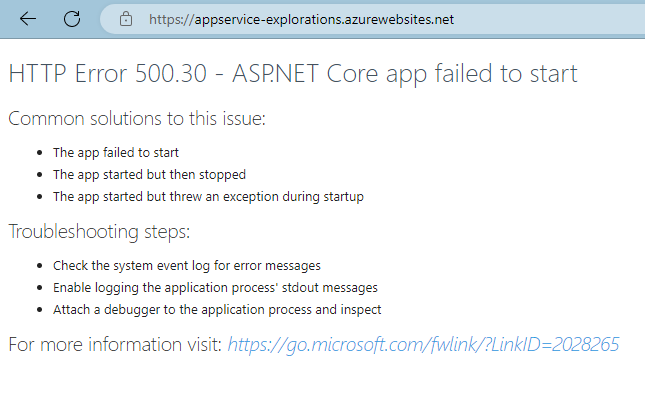
What if it is throwing a vague HTTP error on start up and your logs are useless because it didn’t even get to bootstrapping App Insights when the error occurred?
Enter Kudu
Well, it turns out that there is a suite of administrative tools that provide you a lot more control, a lot more behind-the-scenes, get under-the-hood type of utilities that help you troubleshoot and monitor your web application, akin to how you’d do it on your own dedicated machine. You won’t be faulted if you haven’t come across this yet because it is not given much attention in any of the App Service literature although it has existed for quite a while now. the UI is separate and distinct from other App Service blades and it’s a bit clunky, in terms of UX to get to the darn thing. But if you can set aside those minor annoyances, you’ll be rewarded with a set of rich back-end tools for your ASP.NET application.
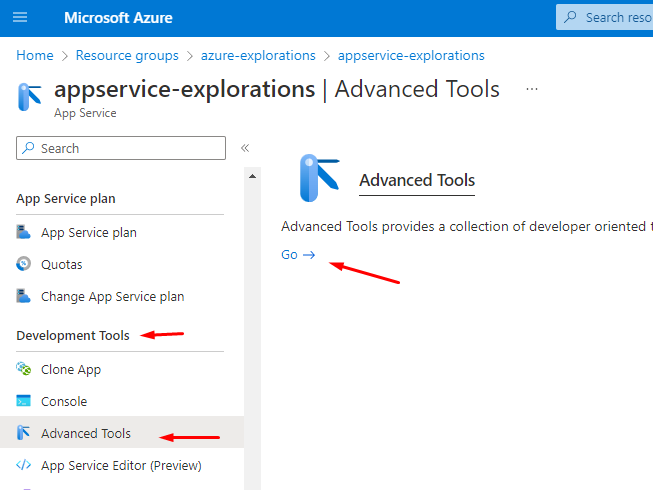
To get to it, navigate to your App Service, scroll down far enough until you get to the “Development Tools” section. Click on “Advanced Tools”. And then click on “Go”. This will open up the Kudu Tools in a new tab/window.
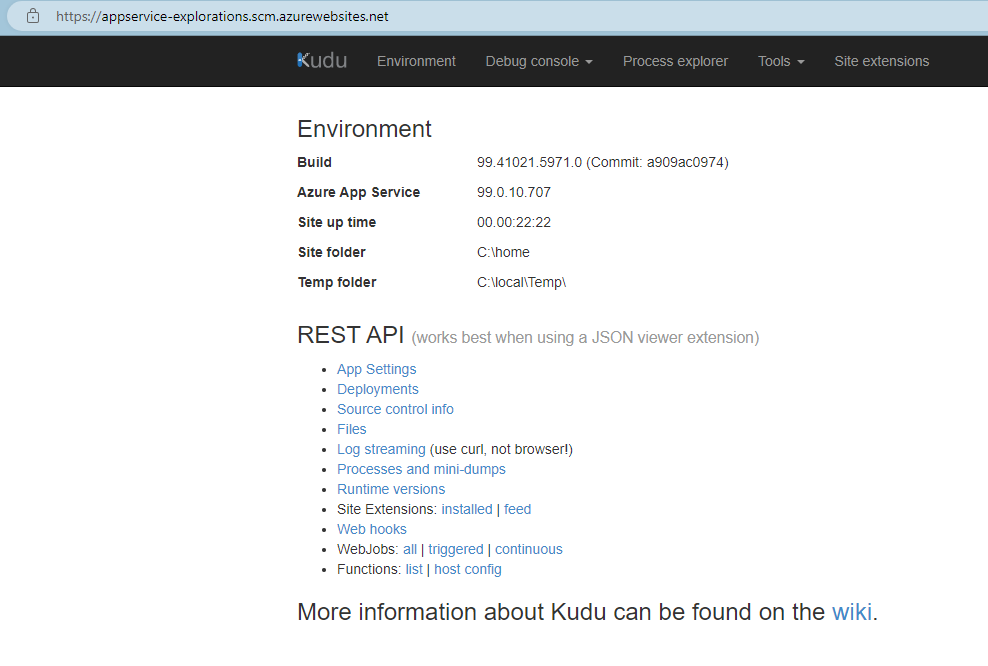
The UI probably didn’t go through product review by the Azure marketing folks but who cares – it’s a great tool built by great developers for us, developers. And it can be extremely valuable in certain scenarios. It has personally helped me in a few tight situations.
This tool has a handful of really nifty features. I can perhaps do a deep-dive in a subsequent post, but for this introductory post, I’ll concentrate on just one of those features – a command prompt in the cloud!
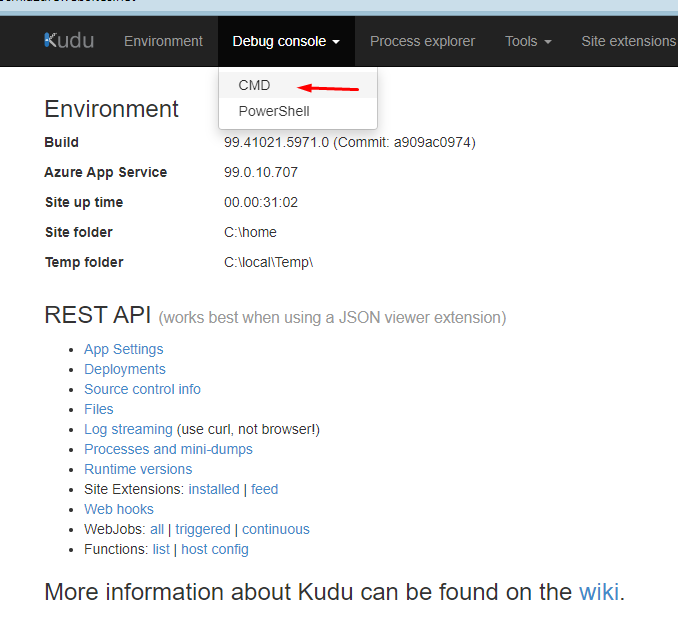
The CMD Console
Click on the CMD menu item (you can also choose PowerShell if you like). You’ll be greeted with not only an impressive web-based emulation of CMD but also a nifty File Explorer too, to visually navigate your web assets.
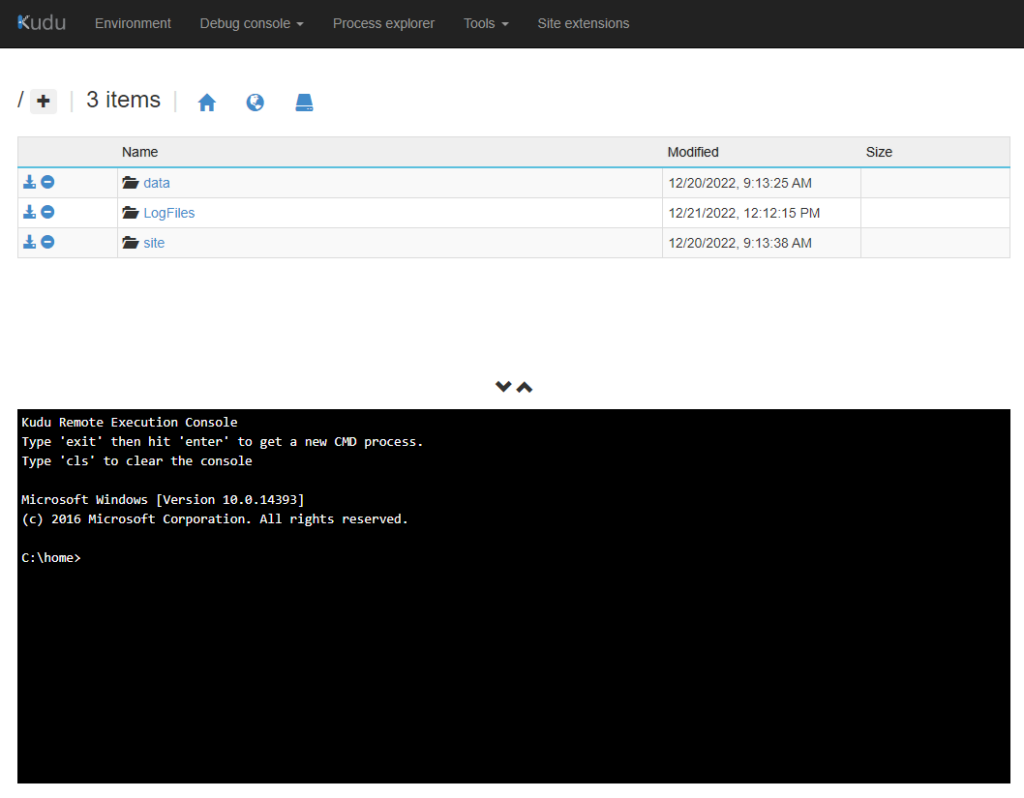
But, wait, there is moar…
- The visual directory/file browser is connected to the CMD console below it such that when you navigate to a particular directory by clicking on it, it effectively does a
cdinto that directory in the console, below. - Oh.. you’re missing a folder or a file in your deployment but don’t want to do a whole another push, commit, merge, pr, build, whatever… just to test out a scenario or two? Why don’t you just simply create it on the fly, here?
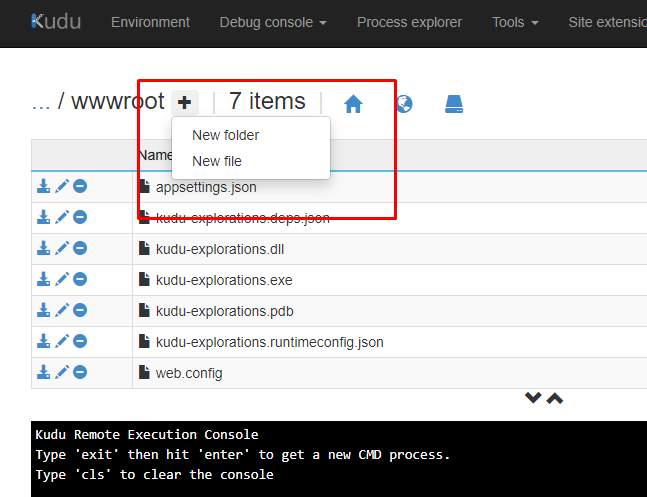
Start Your App Manually
Perhaps you’re in the same boat that I was and didn’t know why your ASP.NET app was not starting up and needed to get some insight before Application Insights ever kicked in. Well, simply navigate to the wwwroot folder (or wherever the root of your asp.net app is) and start it up like so: dotnet your-apps-root.dll
It starts it up (at least tries to) just like you were on your own developer box. More importantly, it gives you all the same output that you’re used to. In my example above, the web app is trying to initialize CORS settings with a null value instead of an array of origins. Here’s that faulty initialization code, for your reference:
var builder = WebApplication.CreateBuilder(args);

// Reference to an appsetting that dotnet can't find
var urls = builder.Configuration.GetSection("AllowedOrigins").Get<string[]>();

builder.Services.AddCors(options =>
{
    options.AddDefaultPolicy(builder =>
        builder.WithOrigins(urls)
        .AllowAnyMethod()
        .AllowAnyHeader()
    );
}
);

var app = builder.Build();
app.UseCors(); // This will generate an error as "origins" is NULL

app.MapGet("/", () => "Hello World!");

app.Run();
This is just one simple example. You can probably think up a lot more useful use-cases for having access to a console to your web app, in the cloud. Maybe you want to git something, or echo out some environment variables, run some custom scripts, view some log files or run some diagnostic tools, the list goes on.
Closing Thoughts
The CMD Console is a powerful tool that is an essential part of Kudu. It allows you to run commands and scripts on the server where your Azure App Service application is hosted, making it an invaluable resource for developers working with Azure. Be sure to familiarize yourself with this tool and all it has to offer. It can save you time and effort and help you keep your deployments running smoothly.