
I grew up on an on-prem Team Foundation Server and graduated from there onto Visual Studio Team Services (VSTS), now known as Azure DevOps. Azure DevOps is a robust and comprehensive solution not only for Continuous Integration / Continuous Delivery (CI/CD) solutions but all the aspects of your software development from managing your project and work items/tickets, source control repositories, wiki, test management features and more.
But Microsoft also owns the world’s biggest source control platform, GitHub. Beyond just source control, GitHub is also placing itself as a comprehensive solution for software development, providing features for project management, tracking work items (issues), Codespaces (dev environments in the cloud), code analysis, code reviews and more. GitHub Actions falls under that umbrella of offerings, providing CI/CD workflows – to build, test and deploy your code in an automated fashion.
Today, let’s look at an introductory example on how you can take a simple web application repository out on GitHub, add some automation via GitHub Actions to build that code, run some automated tests against it and deploy it to Azure Web Apps.
Your First GitHub Action
Let’s create our first GitHub action workflow. Navigate to a repository within your own GitHub account that you want to try out GitHub actions on. Select “Actions” from the navigation menu. GitHub will give you a few starters that you can customize. You can also search for more workflows using the search box provided.
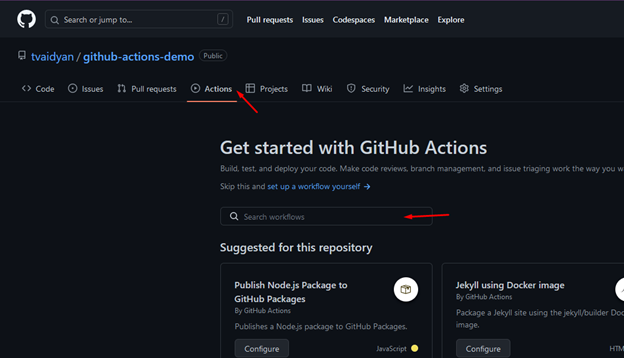
Search for “simple” and select the “Simple workflow” by clicking the “Configure” button.
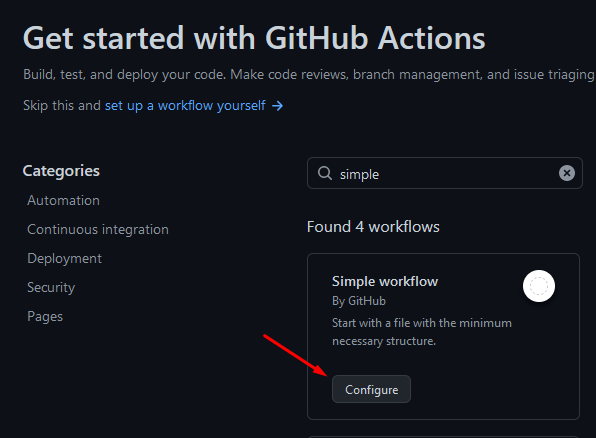
You’ll be presented with a web-based editor with a sample workflow filled out for us in YAML format that we can then begin to edit and customize to make it our own. I’ve copied the entirety of this sample template file for our review, below:
# This is a basic workflow to help you get started with Actions

name: CI
# Controls when the workflow will run
on:
  # Triggers the workflow on push or pull request events but only for the "main" branch
  push:
    branches: [ "main" ]
  pull_request:
    branches: [ "main" ]

  # Allows you to run this workflow manually from the Actions tab
  workflow_dispatch:

# A workflow run is made up of one or more jobs that can run sequentially or in parallel
jobs:
  # This workflow contains a single job called "build"
  build:
    # The type of runner that the job will run on
    runs-on: ubuntu-latest

    # Steps represent a sequence of tasks that will be executed as part of the job
    steps:
      # Checks-out your repository under $GITHUB_WORKSPACE, so your job can access it
      - uses: actions/checkout@v3

      # Runs a single command using the runners shell
      - name: Run a one-line script
        run: echo Hello, world!

      # Runs a set of commands using the runners shell
      - name: Run a multi-line script
        run: |
          echo Add other actions to build,
          echo test, and deploy your project.
GitHub provides thoughtful comments to each item in this template so that we can understand what each line is doing. In short, this workflow will be triggered automatically whenever a push is made to the main branch. It will also trigger if a pull-request is submitted against the main branch. The workflow goes on to define a single job with three steps. The runs-on attribute tells GitHub actions to run these steps on an Ubuntu based worker agent. This example job:
- Checks out the branch so that it has access to our source code.
- It runs a simple one-line script that echoes “Hello, world!”
- It runs a simple multi-line script that echoes out two additional lines of text.
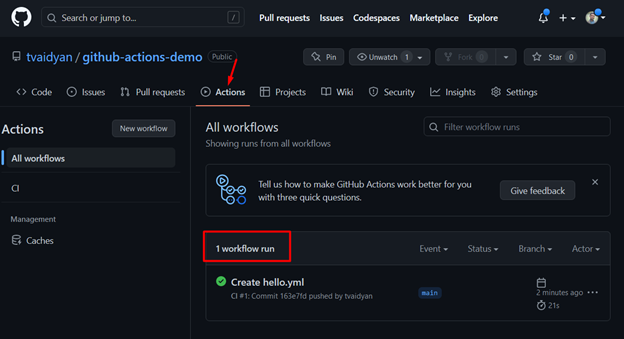
We can run this, as is, just to get a feel for what it will do. I’m going to name the file hello.yml and then commit the file to my main branch which will automatically trigger this workflow. After the commit, visit the actions page again. It shows that the automated workflow has been executed.
Click into it to see additional details. You’ll see all the steps that it executed and how they align with what we had setup in the yaml file, earlier.
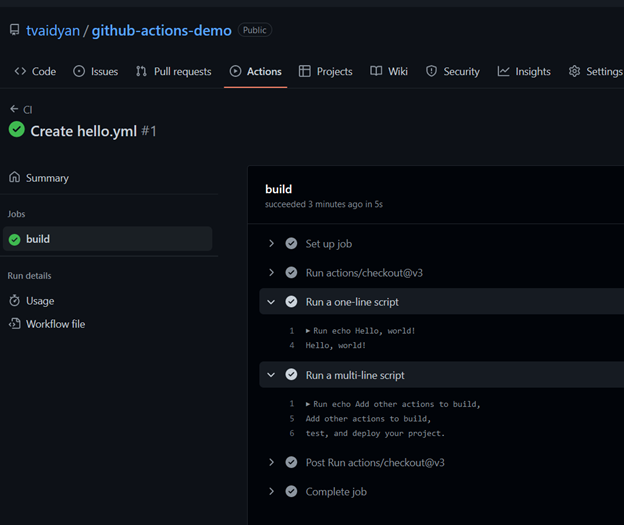
Congratulations! You have successfully run you very first GitHub action.
Build and Test a Vue App via GitHub Actions
Now, let’s modify this workflow further. My demo repository consists of a starter Vue 2 application. If you’re unfamiliar with Vue, that’s okay; you can still follow along and I’ll call out the relevant details. I’ll modify the workflow so that it not only just checkouts the code but also does a build of that code and also automatically runs any unit-tests enclosed within. It saves the build output for deployment. My updated workflow file looks like this:
# This is a basic workflow to help you get started with Actions

name: CI

# Controls when the workflow will run
on:
  # Triggers the workflow on push or pull request events but only for the "main" branch
  push:
    branches: [ "main" ]
  pull_request:
    branches: [ "main" ]

  # Allows you to run this workflow manually from the Actions tab
  workflow_dispatch:

# Setup environment variables
env:
  NODE_VERSION: '16.13'

# A workflow run is made up of one or more jobs that can run sequentially or in parallel
jobs:
  # This workflow contains a single job called "build"
  build:
    # The type of runner that the job will run on
    runs-on: ubuntu-latest

    # Steps represent a sequence of tasks that will be executed as part of the job
    steps:
      # Checks-out your repository under $GITHUB_WORKSPACE, so your job can access it
      - uses: actions/checkout@v3

      - name: Set up Node.js
        uses: actions/setup-node@v3
        with:
          node-version: ${{ env.NODE_VERSION }}
          cache: 'npm'
          cache-dependency-path: '**/package-lock.json'
      - name: npm install, build, and test
        working-directory: hello-world
        run: |
          npm install
          npm run build --if-present
          npm run test:unit --if-present

      - name: Upload artifact for deployment job
        uses: actions/upload-artifact@v3
        with:
          name: frontend-site
          path: hello-world/dist
I’ll highlight the relevant changes in this modified version:
- I’ve added a new
envsection. You can use this section to setup environment variables that you want the build agent to access while it’s doing work. In my example above, I’m setting a variable namedNODE_VERSIONthat species the version of Node that the build agent must use to carry out my workload. - I’ve kept the checkout task from the previous example but removed the tasks that simply echoes some messages to the console.
- Added a new
actions/setup-node@v3task to setup Node for building the Vue source code. - Added npm scripts to install dependencies (npm packages) for the project, build – to create a production deployment ready version of the app and test – to run the unit-tests within the project. I’ve included 3 very basic unit tests for demonstration purposes within this repo.
- Finally, I added the
actions/upload-artifact@v3task to take the build output that was created in the previous step and set it aside as an artifact so that it can be deployed to a web server.
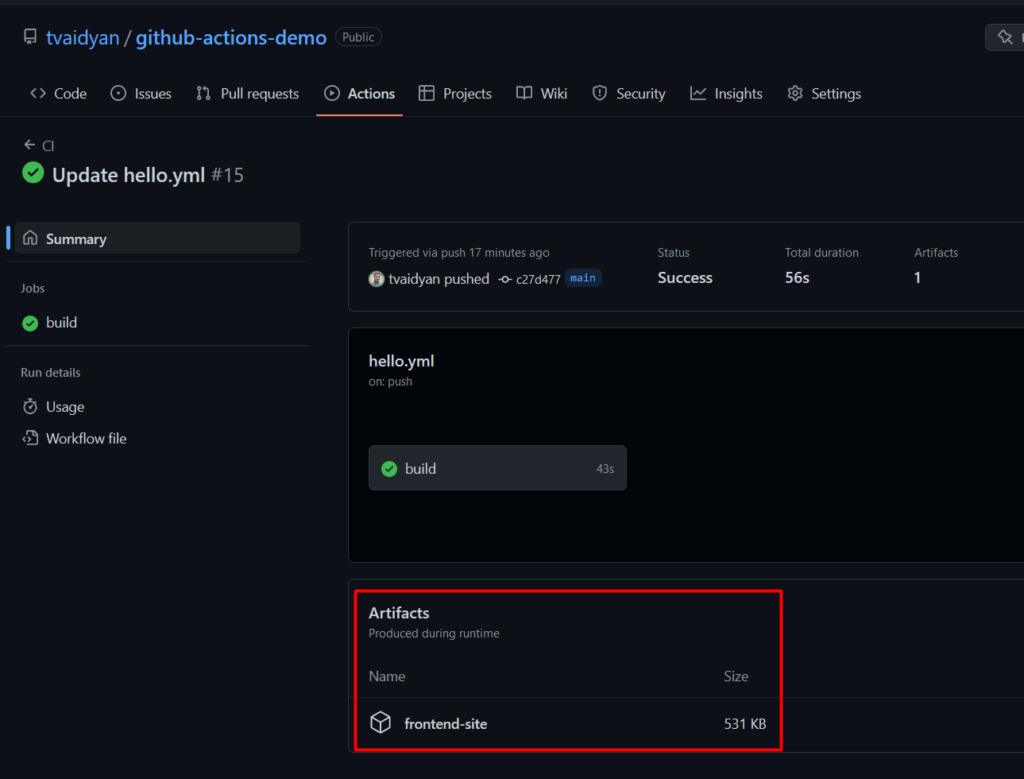
Run your pipeline once again and review the build output. If all goes well, it should give you a green check mark affirming that the pipeline executed successfully. When you view the details, you’ll also see the build artifact – a deployment ready, compiled version of the Vue application that the workflow produced.
Closing Thoughts
Tune in next week to see how we can use GitHub actions to connect to our Azure subscription and deploy this Vue app to Azure.
You can checkout the companion repository for this post on my GitHub account here: