
For the past few episodes we’ve been looking at different ways we can run containerized docker applications in Azure. This installment builds on those steps, so if you’ve missed them, you can check them out using the links below.
Running Your Containerized Applications in Azure App Service
Running Your Containerized Applications in Azure Container Instances Service
Azure App Service is one of the OG services in Azure and for those of us that have come from the IIS world and have been deploying our web apps there, it provides the same familiar interface and concepts to deploy a containerized application. Next, we looked at Azure Container Instances. It provides a good offering in terms of deploying monolithic containerized applications or any one-off services that we want to run in a containerized environment. However, if you’re building a microservices based application with many containerized pieces that all need to work in concert with each other, you’ll want to use a Kubernetes cluster. While there are other players in this space, Kubernetes has clearly become the gold standard when it comes to container orchestration. However, if you’re not interested in dealing with the complexity of building and maintaining a Kubernetes cluster, Azure’s got you covered. With the Azure Kubernetes Service, you have the power of a Kubernetes cluster at your disposal without having to do all the hard work of creating and maintaining that infrastructure. You simply get to provision one and utilize it and concentrate your efforts on your application itself. In this episode, we’ll see how we can create one and deploy a sample app into it.
Provision an Azure Kubernetes Service Instance
Head on over to the Azure portal and search for Azure Kubernetes Service, or AKS and create a new cluster.
Go through the wizard to provision a new instance, just as you would for any other Azure resource.
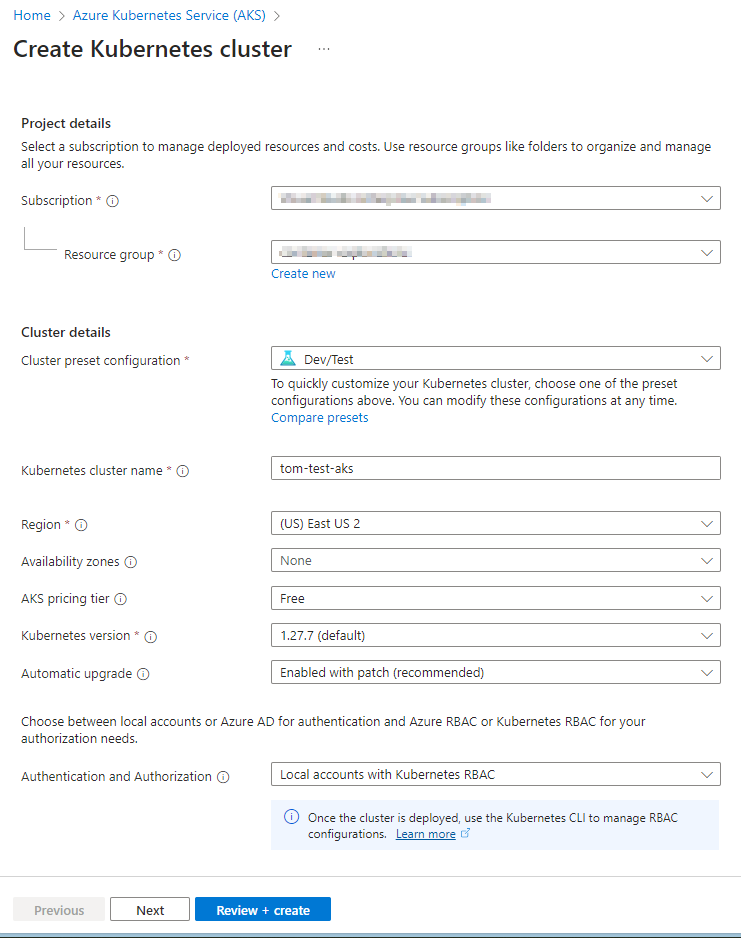
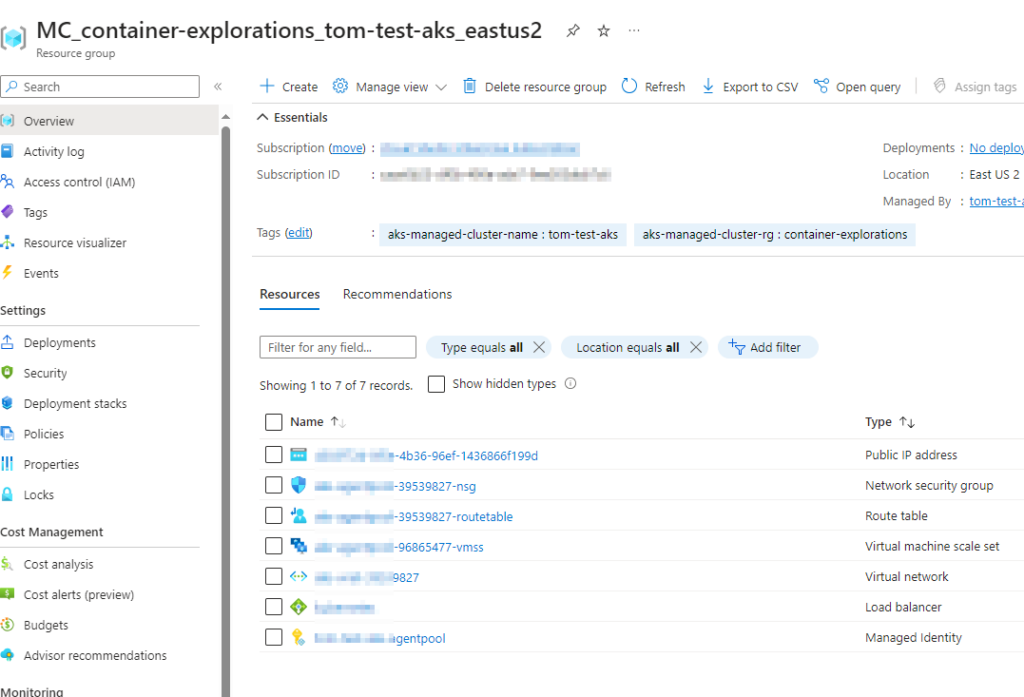
I have opted to use the “Dev/Test” preset and the “Free” AKS pricing tier as this will be a good economical way for me to experiment with this service. Review and create. After a few minutes, your new instance should be provisioned. You can click on “Go to Resource” to navigate to your new instance. Also, if you look at your resource groups, you’ll see that a new resource group has been created automatically for you by this process in which you’ll see the various components that make up your AKS cluster.
Connecting to our New Azure Kubernetes Cluster
Now that we have our new cluster running, let’s connect to it. We can use CloudShell, or Azure CLI or Azure PowerShell to do so. I’m using my local terminal and Azure CLI for this demo. Firstly, we want to merge the cluster credentials with our Kubernetes configuration file so that kubectl (our command-line utility that facilitates our communication with our Kubernetes cluster) can connect to our cluster and control it.
az aks get-credentials --resource-group [your-rg-that-has-your-aks] --name [your-aks-name]If you need a list of all aks commands that you can issue from Azure CLI, you can check out the reference here. Now you’re ready to issue commands with kubectl. You can test this out by running commands such as kubectl get nodes or kubectl get pods or kubectl get all. We’ll see that we have our nodes running but there are no pods deployed to them. Next, let’s create a manifest file for deploying our app to this new cluster.
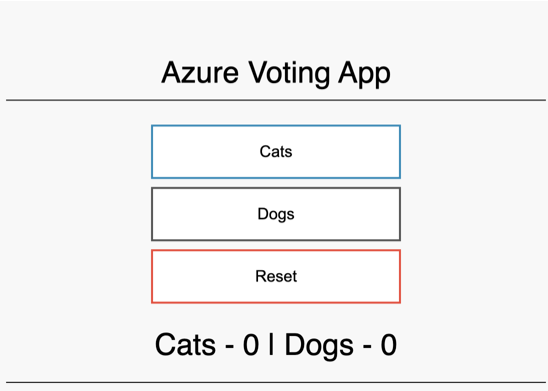
I’ll assume that you are already familiar with the basics of Kubernetes. To keep this demo simple, we’ll use a sample open-source application that Microsoft has created and published out on GitHub to demonstrate the capabilities of AKS. This sample application consists of a Python frontend and a Redis backend. You can check out that repo, here:
Azure-Samples/azure-voting-app-redis: Azure voting app used in docs. (github.com)
On our local machine, let’s create a manifest file (I named mine azure-voting-app.yml) and copy the contents of the azure-vote-all-in-one-redis.yaml into it. The contents are also referenced below, for your convenience.
apiVersion: apps/v1
kind: Deployment
metadata:
  name: azure-vote-back
spec:
  replicas: 1
  selector:
    matchLabels:
      app: azure-vote-back
  template:
    metadata:
      labels:
        app: azure-vote-back
    spec:
      nodeSelector:
        "kubernetes.io/os": linux
      containers:
      - name: azure-vote-back
        image: mcr.microsoft.com/oss/bitnami/redis:6.0.8
        env:
        - name: ALLOW_EMPTY_PASSWORD
          value: "yes"
        ports:
        - containerPort: 6379
          name: redis
---
apiVersion: v1
kind: Service
metadata:
  name: azure-vote-back
spec:
  ports:
  - port: 6379
  selector:
    app: azure-vote-back
---
apiVersion: apps/v1
kind: Deployment
metadata:
  name: azure-vote-front
spec:
  replicas: 1
  selector:
    matchLabels:
      app: azure-vote-front
  strategy:
    rollingUpdate:
      maxSurge: 1
      maxUnavailable: 1
  minReadySeconds: 5
  template:
    metadata:
      labels:
        app: azure-vote-front
    spec:
      nodeSelector:
        "kubernetes.io/os": linux
      containers:
      - name: azure-vote-front
        image: mcr.microsoft.com/azuredocs/azure-vote-front:v1
        ports:
        - containerPort: 80
        resources:
          requests:
            cpu: 250m
          limits:
            cpu: 500m
        env:
        - name: REDIS
          value: "azure-vote-back"
---
apiVersion: v1
kind: Service
metadata:
  name: azure-vote-front
spec:
  type: LoadBalancer
  ports:
  - port: 80
  selector:
    app: azure-vote-front
Without going into too much detail about the deployment file, let me give you a quick overview of what’s defined within it:
- The first deployment, named azure-vote-back, creates a single replica of a Redis container (image: mcr.microsoft.com/oss/bitnami/redis:6.0.8). It is configured to allow empty passwords and exposes port 6379. It’s designed to run on a Linux node (“kubernetes.io/os”: linux).
- Accompanying the azure-vote-back deployment is a service of the same name, which exposes port 6379, enabling network access to the Redis instance.
- The second deployment, azure-vote-front, also creates a single replica, this time of a front-end container (image: mcr.microsoft.com/azuredocs/azure-vote-front:v1). It exposes port 80, has specific CPU resource requests and limits, and is configured to interact with the Redis instance (azure-vote-back). This deployment uses a rolling update strategy with specified parameters for update management.
- Lastly, there is a LoadBalancer service named azure-vote-front associated with the front-end deployment. This service exposes port 80 and is responsible for distributing incoming network traffic to the front-end pods.
- Both deployments and services are linked through selectors and labels (e.g., app: azure-vote-back and app: azure-vote-front), ensuring that the services route traffic to the correct pods.
Running Our App in AKS
Let’s apply this desired state to our AKS cluster:
kubectl apply -f azure-voting-app.yamlIf all goes well, you should get a response that azure-vote-back and azure-vote-front has been created. Issue a kubectl get svc command to see the External-IP that was auto-assigned to your frontend application.
Now, navigate to this IP address using your favorite browser and you should see the Azure Voting App running.
Closing Remarks
Congratulations! You have successfully created an Azure Kubernetes Cluster and deployed an application with two containers into it. AKS provides an efficient way to setup a Kubernetes cluster in the cloud without you having to be an infrastructure expert. At the same time, you get all the power of Kubernetes as you can issue kubectl commands just like you would, if you created this cluster from scratch.
In this introductory post, we glossed over what Kubernetes is, as our focus was simply on exploring yet another way of running a containerized app in the Azure cloud (and not Kubernetes in particular). In a future episode, we can explore what Kubernetes is and explore the benefits of running your container applications in an orchestration system like Kubernetes.