
If you want to review the basics of Redis – what it is, how to quickly get an instance of it up and running on your local developer machine, how to interact with it using C# and ASP.NET, please see my Introduction to Redis in ASP.NET post, here. In this 2nd installment of the series, we’ll look at how we can setup and run the Azure Cache for Redis service. This is a fully-managed version of Redis – i.e., Microsoft will take care of the installation and maintenance of the Redis server and the underlying infrastructure on which it will run. We can select the configurations that we need from the Azure Portal and simply utilize that instance from within our applications without having to care and feed the Redis system itself.
Installation
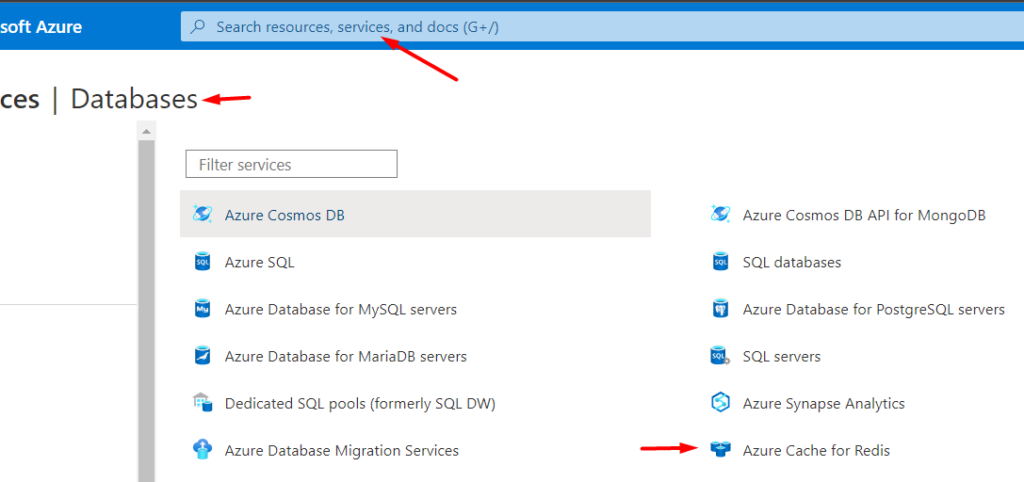
Head on over to the Azure Portal. You can find Redis under the category of databases or you can navigate to it by utilizing the main search bar.
Enter the required details, specifying the Azure subscription that you want to use (if you have more than one), the resource group that you want this Redis instance to be grouped with, a unique DNS name to access the instance via the Internet, the Azure region where this instance should live, etc. Pay close attention to the “Cache type” selection as this determines how much you’ll be billed. You can get a relatively inexpensive instance for about $16 USD per month. On the other hand, if you want the beefiest of specifications, you can spend upwards of $32,000 USD doing so… and remember – that’s per month!
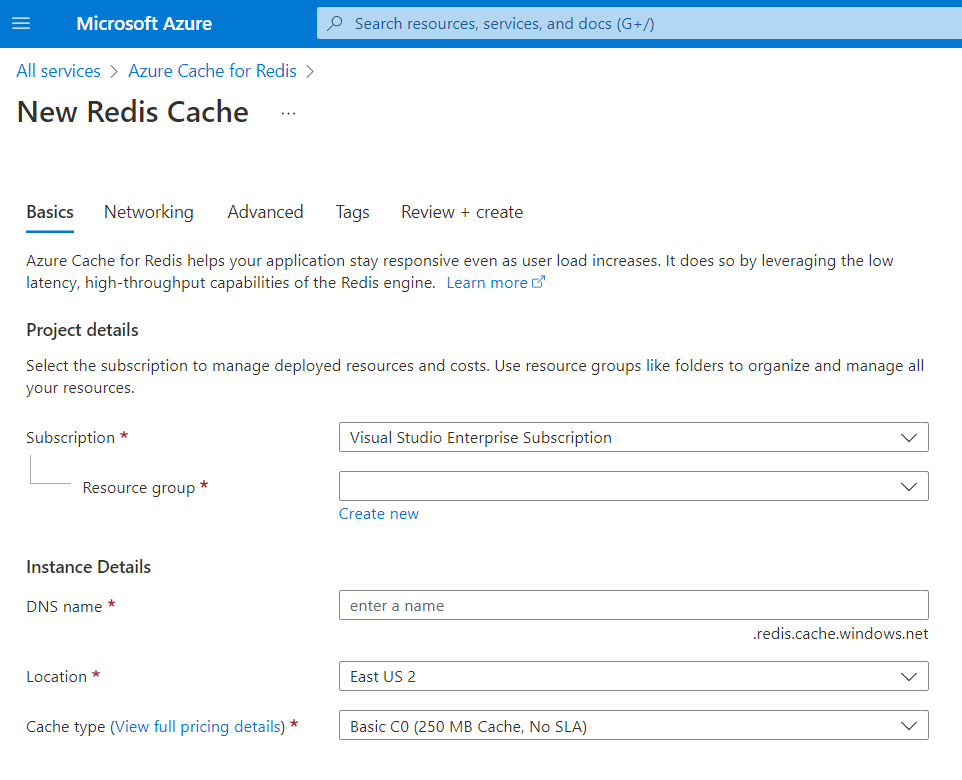
Complete the rest of the setup wizard, review and “Create” your instance. It should be ready for use in just a few minutes.
Test it Out
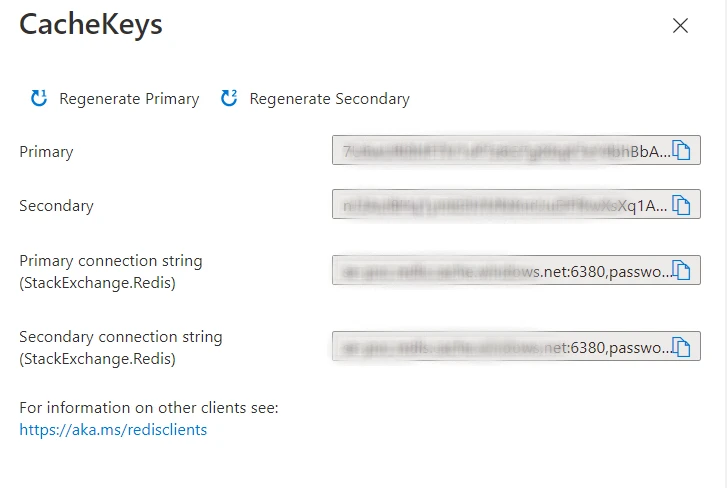
Let’s take our new Azure Redis Cache out for a spin. Remember the previous post where we wrote a small ASP.NET application to connect to a local Redis instance running in Docker? Well, simply change the connection string from local to the primary or secondary connection string associated with your new Azure instance. To obtain it, click on the instance name and from there, click on “show access keys”.
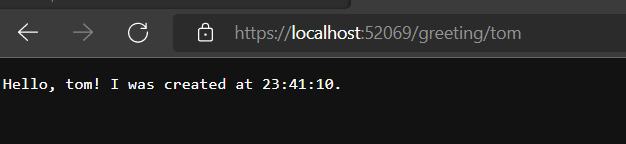
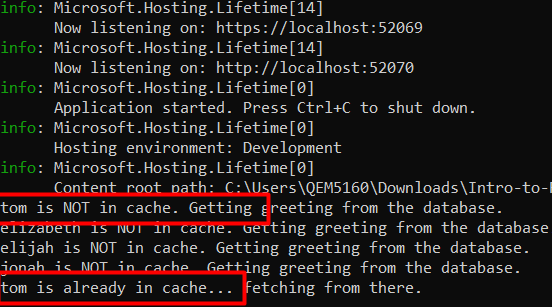
Run the program and it should function just like it did before with the only exception being that the Redis instance you’re now connecting to lives in Azure. To test, navigate to the/greeting endpoint with a /[string] attached at the end. Try with various names and then repeating names that you have already used to see the app pull the response from the Redis cache.
Review the corresponding console entries.
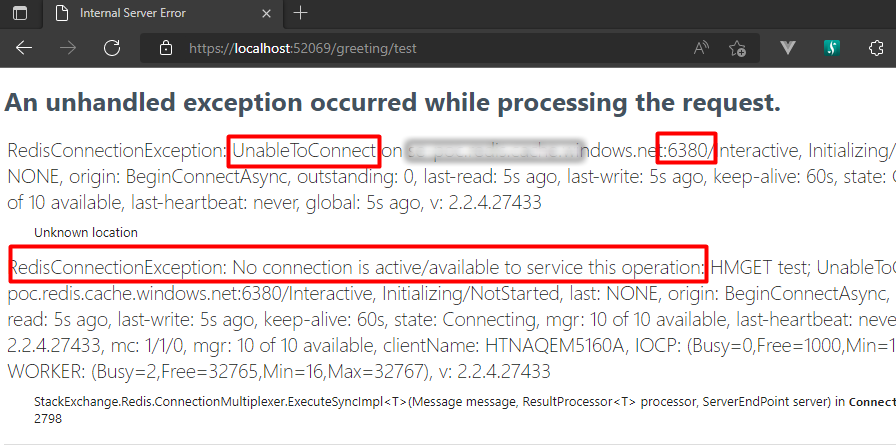
Please Note: Azure Redis runs on a non-standard port, 6380 in my case. If you’re on a corporate network or on another firewall setup where most ports are blocked by default, you’ll have to get that port opened up by the person in charge of your network access. An error like the one shown below is a good indication of this.
Console Access to Your Azure Redis
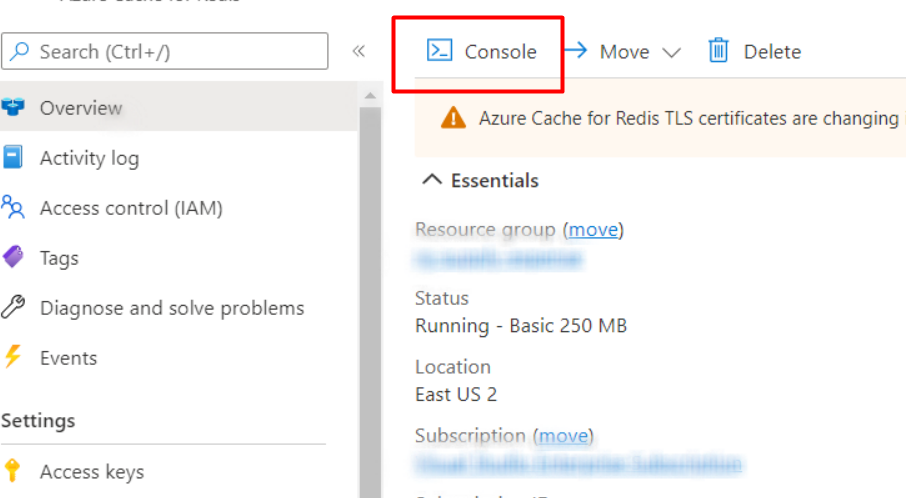
Now, how can I confirm that I’m indeed hitting my new Azure Redis instance? One way you can verify that is by navigating to the web-based Redis Console provided by Azure.
You can get a full list of commands, here. Try a few out. Here are a few examples:
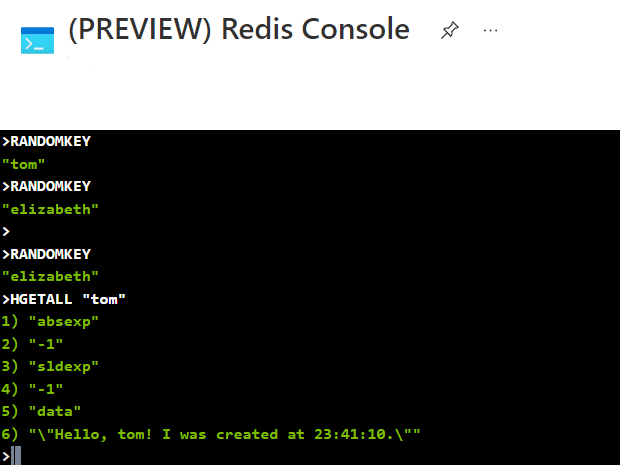
The RANDOMKEY command gets a random key name from your Redis cache. If the value of the key is a STRING, you can use GET [keyname] to fetch its value. If the value is stored as a HASH, as it is in our example app, you can fetch the value by using the HGETALL [keyname] command. You can also figure out the data-type of a key by issuing the TYPE [keyname] command.
Closing Remarks
That concludes our whirlwind tour of Azure Cache for Redis. Check out my sample GitHub application from last week, change the connection string to your own instance of Redis and go play with it!